Wednesday, July 2, 2014

Alcohol Ink Stamped Candle Holders

We created alcohol ink stamped candle holders for Mother's Day and end-of-the-year teacher gifts this year. These were SOOOO easy to make! And took no time at all!

Here's what you will need:
--Adirondack Alcohol Inks
--Alcohol Ink stamp handle
--felt pads to stamp with
--clear glass candle holder (I got ours at Dollar Tree and Target)
--votive candle (or LED votive candle)

We first played around with alcohol inks a couple years ago when we made all kinds of coasters. Check out this post for more in-depth information about playing around with alcohol inks.

For this project, I purchased a bunch of glass candle holders from Dollar Tree and Target (for $1.69 each). We used up to three colors of ink on the alcohol ink stamp pad (similar to this photo from our initial coaster project):
Then we simply stamped the ink around the glass. Let it dry and you have AMAZING results! It took maybe 10 minutes for the girls to each make 3 candle holders. This is definitely something you could make in bulk for party favors or gifts!

Here are the dramatic results! Forgive the multiple photos. You know how I LOVE LOVE LOVE to photograph glass art. Unfortunately, it was a really cloudy day when I took these or they could have been even more fabulous. Oh well. ;-)


 Here are the smaller versions from Target that we also gave to people:

I also bought a clear glass plate from Kohl's (for $10) and used alcohol inks on the bottom of the plate and gave it to my mom for Mother's Day. I will have to make more of these because I think they are so pretty!


I did seal the bottom of the plate with a coat of polyurethane spray so that she could wash the plate if she used it for serving desserts or anything like that. I did not seal the candles. We just let the recipients know that they shouldn't leave them outside or get them wet.

Such an amazingly easy project!

Our Garden Art 2014

Our house is located on the corner of our subdivision. It's actually a really busy corner and one of just a few access points for our neighborhood, so MANY people turn in and drive by our front yard everyday (sometimes multiple times a day). I feel a certain amount of responsibility to represent our neighborhood well and always like our front landscape bed to look nice. Plus, I just enjoy making our yard look pretty! Here is this year's version of our garden art!


I feel I have finally discovered how to make a DURABLE painted flower pot! One of our pour-paint pots from last year did survive and I have that by our front door this year:
I didn't seal the inside or the outside of our flower pots last year with pottery sealer. And I didn't seal the outside right away with polyurethane spray so by the end of the summer the paint was bubbling up and peeling off. I learned from this and have improved our technique this year.

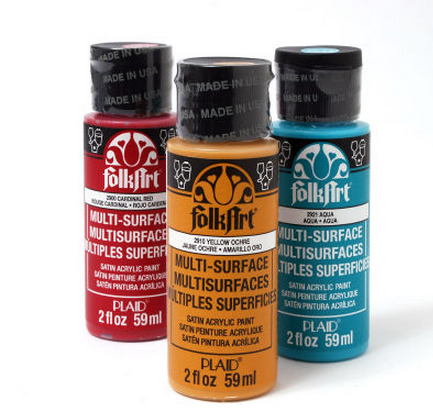
The paint we used this year would not be good for pour-paint unless thinned because it is too thick to run down the sides of the pot. You would also have to buy quite a bit of paint to achieve the pour paint look. HOWEVER, this paint is EXCELLENT for painting designs on the pot!

Photo credit: Decoart

Photo credit: Michaels
Both of these brands of paint worked great! And have withstood over 5 inches of rain in the month of June alone. The only difference is that the Folk Art covers more quickly and the Patio Paint requires multiple coats to cover completely.

Before we did anything this year, I sealed the inside and the outside of our pots with Pottery Sealer like this from Michaels:
Photo credit: Michaels
Here are our painted masterpieces for this year:
My painted pot

My 10 year old working on her pot. She came up with this absolutely AMAZING impressionist-type paint style that turned out just GORGEOUS! I cannot begin to tell you how much I love love love this pot! And how impressed I was with it!
Her work space!
Finished pot in the landscape bed.
After we painted the pots and they dried, I sealed them with the pottery sealer again and then one last protective coat of polyurethane spray. That seemed to do the trick as this paint has lasted amazingly well so far this summer!

I also used the paint above to paint this garden lantern:
It was white when I purchased it from Michael's. I used alcohol ink on the glass. You can see it partially done in the photo below:
I painted the lantern and then sealed the whole thing with polyurethane spray. The alcohol ink has stood up to the weather elements, but it has faded a bit from the sun. Overall, I'm pleased with how well it's standing up to nature.
The landscape bed when we first finished it this spring.
We also created a couple pots to gift to people. I think these turned out really fun!
My 8 year old's pot.
I used our "created by" stamps to label the bottom of the pots by painting the stamp with the patio paint and then spraying the bottom with polyurethane spray.
Happy Fourth of July! Hope you all have a wonderful holiday this week!!