Tuesday, November 15, 2011

Craft Project: Super Easy Beaded Bracelets

Mt. Vernon, Iowa is a fun little town about 25 minutes from my mom's house. The girls like to go there when we visit because there are a couple cute little shops, including an antique store that also sells beads to make jewelry.
They had this very cool coiled wire to use instead of some sort of elastic or other type of string. We spent maybe $11 and got enough supplies for the girls to each make two bracelets.
I used a needle-nosed pliers and bent the end of the wire so the beads would stay on:
The wire was pretty easy for the girls to thread the beads onto, though you had to be a little careful about it snapping back if you let it go.
The finished product:

Craft Project: Fall Leaves

I grew up in the Midwest which can have gorgeous Fall weather. I moved to Texas and California where Fall simply does not exist. I missed it so much! The changing of the leaves, sweater weather, the last few days of mid-range temps before winter sets in. One of the things I LOVE about living back in the Midwest is FALL!

And my girls love it too! We visited my mom down in Iowa a few weeks ago and my girls started a secret project out in the backyard. They needed tape. Hmmm....they were out there for awhile and they were working so nicely together! When they were finished, they presented this wonderful leaf wreath to me. :-)
I actually don't have a picture what it looked like when they brought it to me. We put it in a ziploc bag with an apple slice (so the leaves wouldn't dry out) to bring it home. When I went to pull it out, I realized the moisture from the apple slice made the tape they used lose its adhesive. So I very carefully pulled it out and threw some Glue-all under the different layers and then mod podged it. The glue would be the white you see in the photo. All that glue and mod podge seemed to do the trick and here it is hanging in my kitchen. :-)
I also collected a few leaves from my mom's yard and brought them home. We just have pine trees in our yard, so it's a novelty for us to walk out the back door and find a ton of leaves on the ground.I mod podged my leaves and made a leaf garland out of it to decorate our dining room for Thanksgiving. The mod podge seals the leaf preserving it. It keeps its color AND doesn't dry out.

Friday, October 28, 2011

An Eloise Birthday Party!

I typically have birthday parties here at our house. I come up with a theme, throw a couple games together, feed the kids, let them play and then be done. I also decided a couple years ago that I would do planned birthday parties for our kids until after their 7th birthday. After that, they can pick a couple friends and we'll go do something fun like the rides at Mall of America (or equivalent).

This year, I went more overboard on the party decorations than I usually do because I was so excited about the theme! My daughter loves the Eloise books, she has blonde hair, and loves the color pink! AND she was turning six this year! All of this combined made me decide to do an Eloise-themed birthday party. Can I just say, I LOVE LOVE LOVE Pinterest! I never would have come up with any of these ideas without it!

If you are not familiar with the Eloise books and have a daughter in kindergarten, you definitely should check them out! Very cute! There are two movies on DVD as well that my daughter enjoys watching.
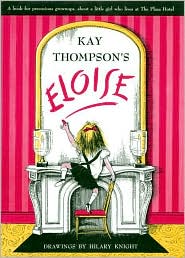
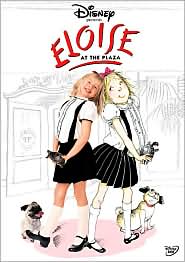
These two images on Pinterest definitely inspired me for the party:

I bought striped scrapbook paper just like this and copied the invitation almost exact. I used a circle scrapbook punch to cut out the circle and just cut a diagonal line to make the door hanger look like a door hanger.
Each girl had their own place complete with their name on a place card.And an Eloise water bottle. I just took the water label off. Cut strips of the invitation paper and used the adhesive already on the bottle to stick the paper on. I printed Eloise images on the computer used my circle punch to cut them out and glued them on top of the paper with a glue stick. Quick note: I also made all the tissue paper puff balls for the decorations. Super easy to make with an online tutorial. There's my birthday girl in her zebra skirt! She loves zebra print, so I went with that for the dinnerware theme. She was a little embarrassed when my husband came downstairs dressed like a fancy waiter:
Embarrassed enough to cry and tell him to take the tux off (he actually bought the tux for $50 back in our college days--and it still fit him!). Luckily, guests started arriving before anything could be negotiated so he kept the tux on. And guess what all the girls LOVED it! He served them dinner and they got the biggest kick out of it.
That's sparkling juice by the way ;-)
Cheers to Lily's Birthday!
The food for the party. Usually, we just order pizza and have go-gurt and juice boxes for our birthday parties. But, somehow, that didn't seem worthy of a Plaza hotel dinner. So I decided to do easy, yet fun and fancy food. I also considered the fact that the birthday girl has an allergy to peanuts. I made almond bark pretzels with pink sprinkles--using vanilla flavored almond bark that actually said on the package (NOT processed in a factory with nuts! Whoo hoo!).
Their appetizer was strawberries and grapes with strawberry shortcake yogurt cups to dip it in (totally stole this idea off Pinterest as well):
Then I made pizza bites both cheese and pepperoni. These are sooo easy. I was just hoping the girls would like them. And turns out they LOVED them! The recipe can be found at this link: Pepperoni Biscuit Bites.
Finally, in lieu of a cake, I decided to do something completely different! We have a great donut bakery near us called YoYo's Donuts. And it is completely peanut/treenut free! They've made donut cakes before, and originally I was thinking of getting a donut cake. But I wasn't sure what shape it should be in for an Eloise party. Then I thought of cake pops...and why couldn't we do donut hole pops! The bakery was kind enough to oblige my request!
They came to me just stuck in a styrofoam cirle. I added the ribbon around the bottom. Stuck tissue paper in-between the pops. Printed out a little Eloise on paper and stuck her in the middle. Volia! An Eloise donut pop centerpiece! I had them do a sprinkle covered long john as well so we would have something to put candles in:
We had a pinata for one of the games. And my 8-year old daughter actually came up with a party game all on her own: Pin the Bow on Eloise's Head! My husband printed this out on several sheets of paper and taped it together. I quick drew and cut out a bow for each girl with their name on it so we would know which bow belonged to which child.
I have to say. I had a fantastic time putting this party together. But I love doing this kind of thing. I wasn't sure how the "fancy" dinner would go over with six and eight year old girls. But they absolutely LOVED it! I got some feedback from a couple of the moms too. They both said that their girls had a great time and loved that it was quieter and not so crazy for a birthday party! In this day and age when I feel like most people do parties at bouncey places, Chuck E Cheese and the like (and there is absolutely nothing wrong with that. My kids love those kinds of parties!), it made me feel really good to know that kids can still have fun and enjoy a low key birthday party at our house! And I felt like all my effort was worth it and that Lily had a really fun 6th birthday.

Nightstand Lamp Re-do

I was browsing around a free app on our iPad for Family Fun Crafts one day this summer and came across a project to redo a lamp for a girl's bedroom. The project in the app looked like this:
I thought this would be perfect for the girls! One of my daughters already had a pink lamp exactly like this in her bedroom. They have these at Target. I waited until they were on sale and got one for my other daughter for $12.99. I bought ribbon that would match their rooms from the $1 bin at Michael's and fake flowers on sale for 50% off (they came to $1 and $2 for each stem). The only other thing you'll need is a hot glue gun! I had the girls help me make decisions about what color ribbon to use, where it should go and how the flowers should be put on. I did do all the hot-gluing myself.
Lamp Re-do #1:
The Supplies: lamp, hot glue, ribbon and fake flowers.
Step One: cut ribbon in lengths that will fold over the top by about an inch and under the bottom edge of the lampshade by about an inch. Hot glue each ribbon equal distance around the lamp (I didn't measure, just eye-balled it). Before I started gluing, we cut the ribbon first and sort of laid it out so we would know about where the ribbon would go. And how many we needed of each color ribbon. Step Two: We put a contrasting ribbon around the top and bottom of the lampshade. I just put a dab of glue in a few spots all the way around.Step 3: Hot glue flowers where desired on lamp. My older daughter isn't quite as girly as my younger daughter, so she just wanted a few flowers in one spot. Also added a flower on the pull chain. Voila! A new lamp!Lamp Re-do #2:
Supplies
Step One: Add vertical ribbonsStep Tw0: Add top ribbon only.Step 3: Hot glue flowers around the bottom at ends of vertical ribbons.Voila! Girly Girl Lamp!

Friday, September 2, 2011

Kid's Room Makeover

I still have to get our last summer art project posted. And I have a few craft posts to get up. BUT, this week has been consumed with redoing my younger daughter's bedroom. The girls are at my in-laws for the week and we decided to redo Lily's room as an early birthday present for her sixth birthday (her bday is at the end of September) and surprise her! Normally, this is probably isn't a post for the arts and crafts blog, except I did create a couple things to accessorize her room. So I thought I would share. First, here's the BEFORE photos, messy room and all!
Lily is very much a girly girl and her favorite colors are pink and purple. She's had a certain fascination with the Eiffel Tower. I'm not sure where it started, but I decided to run with it and we made a Paris themed room for her.
Lily and I actually decorated her nightstand lamp (shown above) a few weeks ago. I'll be doing a separate post on that project soon.A close-up of the ribbon chandelier. I made this! Just get three different sized embroidery hoops and use the inside hoop from each one. Tie them together with mono-filament (or invisible thread). Then hot glue ribbon to each one. This was a bit painstaking and tedious and took a TON of ribbon. But I think it turned out kind of fun. :-)
I painted the Eiffel Tower here. I taped off the canvas in the shape of the Eiffel Tower with blue pianter's tape. And then painted the raspberry color on. Pulled the tape off when the color was dry. Just went over it with black paint to create the outline. Added a few white clouds and voila! Eiffel Tower canvas. :-)
I can't wait for her to see it! I sure hope she likes it, I'm going to be pretty disappointed if she doesn't. :-)

Tuesday, August 23, 2011

2011: Art Project 10--Photography

I have a part-time family photography business that I do just to give me a creative outlet and something that is mine away from the kids and the house. I decided one of our projects this summer should be learning about photography.

I showed the girls the following images by Ansel Adams:
Rose and Driftwood, 1932
Saguaros, Saguaro National Monument, 1933-1942
Church, Taos Pueblo, 1942
Oak Tree Sunrise, 1966
And the very famous image below:
by Alfred Eisenstaedt, 8/14/1945

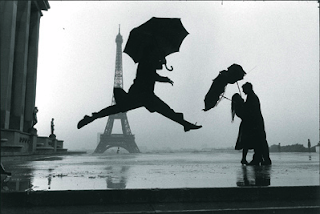
And these Henri Cartier-Bresson images:

I didn't get into anything technical with photography. I just mentioned it had a lot to do with lighting. And that it was really important to pay attention to what is in your camera frame. Don't just walk up and take a photo of anything. Really see how it looks in your camera and make it look visually interesting. We also talked about how photography is catching a moment in time (just like in Henri Cartier-Bresson's photos).

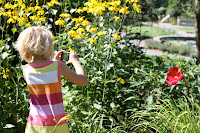
We went to visit the MN Landscape Arboretum and just walked around. It has been a long time since I've been there just to enjoy the area. I'm usually there focused on taking photographs of someone. It was nice to just walk around with no purpose in mind. Here are a few of the photos I took of the girls taking photos:


And here are some of Ella's photos:
The photo above and below are favorites for me. I like that she didn't center the flowers,
but they are off to one side of the photograph.
And Lily's....it's interesting because a good deal of photography is all technical. The girls were just using little point and shoot cameras. But Lily's wasn't focusing properly. The flowers were out of focus while the background was in focus. Kind of bummed about that. Not sure if it was operator error or if maybe the camera was dropped in the past and the focus mechanism isn't working well anymore. At any rate, here are Lily's:
This last one is my favorite of Lily's!