Showing posts with label handmade holiday. Show all posts

Friday, January 1, 2016

Folded Fabric Ornaments!

Wow! It's been a year and a half since I lasted posted! Hard to believe! But, life takes over and well, priorities change! I am so impressed with how many of you continue to find my older posts useful. I created this blog to share our projects and it's so fun to see how others are still enjoying our creations!

In the last year, my girls and I have ventured into fabric and sewing! They are now 10 and 12 years old! And so self-sufficient! They search for projects on Pinterest and watch tutorials on You Tube. It's been truly amazing to see what they come up with and create.

Last year, I taught myself to quilt and made each of the girls a new quilt for their bed (I'll try to post about those before another year and a half goes by). I'm in the middle of one for my son that I hope to finish yet this winter.

More than a year ago, I came across a super fun blog called The Ornament Girl and loved her creations. With my newfound interest in quilting, I revisited her site last month to take another look at her ornaments. On a whim, I bought her December Ornament kit. With my purchase, I received an e-book tutorial for how to make the ornaments and I immediately went to work before I ever even received Staci Ann's kit in the mail!

Here is my first ornament attempt!
I just used scraps of fabric I had from quilted hot pads I made last Christmas. I couldn't stop there so I made two more. Here's all three of my first creations:
Then, my 12 year old wanted to learn to make them. So we dug out her jelly roll of fabric she received last year. Soooo easy! It was already cut into strips so we only had to cut it into rectangles to use.

Here is her first attempt!
And then my 10 year old got in on it and here is her first ornament (front and back):
When my kit arrived from The Ornament Girl, I created this in no time at all!
You can see all of our folded fabric ornaments in this facebook photo album....click here!

To learn how you can make these beautiful (and actually, super easy) ornaments, check out the Ornament Girl shop! Don't forget to click on "About" and learn how Staci Ann started her business. I love that I can help support her and her family.
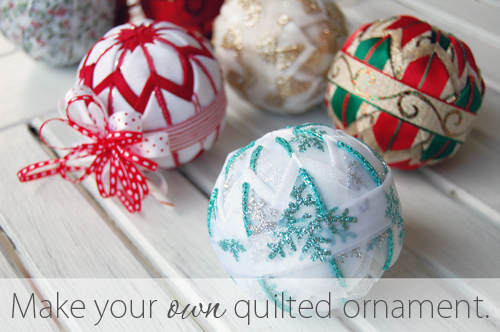
Make your own quilted ornaments. 

Get a free no-sew fabric ornament pattern.  

Sunday, May 26, 2013

The Best of Pour Paint

We LOVE pour-paint projects around here! They are messy, fun, and they always turn out beautiful! I thought it would be fun to post them all together in a "Best of" post! Click on project titles to head to the post and directions for the project!

Pour-Paint Vases

Pour-Paint Glassware
Wine Glasses

Pour-Paint Christmas Ornaments

Pour-Paint Pumpkins

Pour-Paint Flower Pots

Pour-Paint Handmade Cards

Sunday, February 3, 2013

Craft Project: DIY Valentines

We had some time to do a project yesterday morning. I figured it would be nice to get the girls' valentines out of the way. Pinterest is AWESOME for DIY valentines! There are so many options and with FREE printables. Makes making your own valentines soooo easy!

I pinned several options for the girls to pick from. And thankfully they each picked a super simple one. Ella picked this arrow valentine from Sweet Muffin Suite (free printable in the link). Lily picked this super cute bubble valentine from Simply Modern Mom (free printable in the link).
Lily picked this super cute bubble valentine from Simply Modern Mom (free printable in the link).
I used a large needle to poke holes and thread the string through to tie around the bubbles. I had bought pencils at the Dollar store (12 for $1!!) before the girls decided on their valentines. So Lily just taped them to the back of hers.
And there they are! All done 13 days ahead of schedule!
And just for fun, here's a link to our photo valentines from last year. :-) Happy creating!!

Wednesday, January 16, 2013

Toddler Activity: DIY Ornaments

About a year ago, I came across this post at Play at Home Mom. It was a play invitation for a toddler or preschooler to make their own filled ornaments. I LOVED this idea and mentally filed it away to use this past holiday season with my son.

Michael's had tiny little Christmas fillers on sale and I bought things that I thought would appeal to my son's sensory needs. I picked bright, shiny or textured objects. Some were little bells that rang when you shook them. And I bought PLASTIC ornaments for him to fill. I knew glass would not be the way to go with this kid. ;-)

Here is the invitation:
He seemed genuinely intrigued....at first.
He did what I was hoping for with the activity with ONE ornament. BUT, some activities just don't really go how you think they will. Now, I had imagined him having a grand ol' time filling all the ornaments with all the different items in the tray. And I had shiny shredded material to put in as filler as well as red-colored Epsom salt. However, as soon as I showed him the Epsom salt and funnel, he was done for. LOL!
He started off filling the ornament with the salt. But then he just dumped it out. And then wanted to dump his other ornament (with the bells) out. Then he wanted to pile all the shiny little objects together in one part of the dish.
And then he wanted nothing more to do with them. BUT, he did want to play with the Epsom salt more! So I let go of my expectations for the activity and we turned it into a total sensory play moment with the Epsom salt.
He scooped!
 Put it in his hands
 Wrote in the salt
 And poured!
He investigated the material thoroughly and to his heart's content. And I just sat back and enjoyed watching him learn about it!
Sometimes we just need to not have any expectations and see where things take us! :-)