Wednesday, February 29, 2012

Toddler Art Activity: Wiffle Ball Painting

I did it! I finally did it! I let Kellan paint today. I've been wanting to try wiffle ball painting with him. I wasn't sure how it would go because the second he sees a ball he THROWS it. And I was a little nervous about him throwing the ball with paint all over it. I ended up using smaller golf wiffle balls and a plastic toy golf ball because I couldn't find our regular sized wiffle balls.

Here's what we ended up with at the end of the project. :-)
He played with the paint bottles a bit when we first got them out.
He got mad at me when I took his clothes off. I'm not sure what that was about. He might have thought I was changing him to take him somewhere because he was still in his pajamas. And maybe he got mad because he thought I was going to take him away from the fun project.

I started off by putting two splats of paint on the paper and put the balls in the box. I picked up the box and shook it around to show Kellan what he could do. He shook the box a little and then stuck his hand in the paint. He didn't like having it on his hands very much. So I wiped them off and gave him a brush and he was much happier. This sort of surprised me. I really thought he would get into finger painting.
 
He kept asking for more splats of paint. He would point to which color he wanted and I would tell him the color and he would gesture for me to put it on the paper. Every now and then, we rolled the balls around. He batted them around with the brush.

 
Eventually, he got over his issue with having his hands messy. :-) He actually did amazingly well with this activity. I was really surprised he didn't throw the balls, he kept them in the box. And it was fun to watch him create with the paint. He really only got his hands and the table messy so that's not too bad at all. I was planning on giving him a bath this afternoon anyway, so clean up was easy. I'm really glad I finally did something messy with him and that it went much better than my expectations!

Thursday, February 23, 2012

DIY: I Spy Bags and Discovery Bottle, Part 1

I saw an I Spy bag in a fun educational store near us. When I looked at the price I gasped! $18! Especially because many of the objects in the bags were things I could find around our house! I really couldn't justify paying that and figured I could definitely make something similar. Searching Pinterest for "I Spy" or "Discovery bottle" will get you many options.

I happened to be in Dollar Tree today and they have zippered pencil bags with a vinyl window in them. PERFECT!!! For only $1! When I finished at Dollar Tree, I headed to the grocery store and picked up some rice for $1.39. I searched around our house and found a TON of little items I could put in I Spy bags or bottles.
 
 
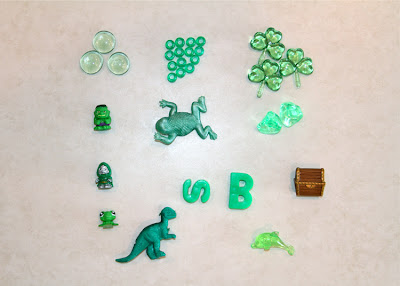
I decided to do a green bag with a bit of a St. Patrick's theme, an ocean themed bag, and a warm colored I Spy bottle. I still have items set aside for a cool colored bottle and a rainbow themed bottle (Part 2 of this post).

For the ocean themed bag, I added some blue food coloring to the rice:
 
I took photos like this of the items in each bag. I broke them down into smaller groups to make it easier for my son. So I have a larger photo of all the items (to make it harder when he gets older) and then will print these as cards for him to use with the bags.
  
For the last bottle I made today, I used dry great northern beans. I actually sort of like how this works a little better than the rice. The objects seems to flow in and out more smoothly. And the bottle with beans seemed to appeal to my 2-year old more. Maybe the added sensory experience of the noise of the beans when you shake it helped hold his attention a bit more. My 6 and 8 year olds seemed to like these as well. You could make the experience a little more advanced for them by telling them to look for something that starts with an "l" in the bag (ie: ladybug).


I haven't done it yet, but I plan to hot glue the lid of this bottle and I saw a tip here that you can hot glue the zipper of the pencil bag. I was trying to think of a way I could secure the zipper. I do sort of want to reuse the bags if I can so I may test the glue on one bag and see if I can peel it off again to re-do the bag.
 
I'm definitely looking forward to making some more discovery bags and bottles! Maybe some involving liquid. And I found enough items today to put together a halloween discovery bag this fall. I didn't buy the black pencil bag. I may have to go back and get one. ;-)

Wednesday, February 22, 2012

Toddler Activity: Learning Colors Through Play

Image from Color Maniacs
You're never too young to start learning colors! And actually, it would be quite a feat for me to teach my 26 month old colors at this point because he is still mostly nonverbal. Even though he only says a few words, he is successfully using the sign for "more" so I'm trying to teach him a few more signs. Only really elementary signs because that is the extent of my sign language knowledge. We're working on 'please', 'thank you' and a few other things. And I'm throwing colors in there too. It would be so cool if he could know his colors by signing and sorting before he can even say the words.

I've approached this in two ways. I started to focus on one color every week or so and I pull toys from our stash that are that color and set them aside (he doesn't see them unless we're doing this activity). I try to pull them out everyday for him to play with. He's not one for sorting or really investigating. He just wants to DO something with them. So I came up with having him drop them in the hole in the bottom of a diaper box and also use the slot in a toy mailbox we have. He loves trying to see if the pieces fit. As he's dropping them in, I say things like, "You have the red block. You're dropping the red block into the box." And as I say the color, I sign it. The awesome thing is that if you don't know sign language you can just google the word you're looking for and find out what the sign is, just like that!
I got the white basket and the pipe cleaners (on the table in the background) at the dollar store. I have him slide the pipe cleaners into the side of the basket. I love that there are different size holes so right now he can put them in the larger ones. As his fine motor skills get better, he can try for the smaller holes.

Another activity that he REALLY seems to like is playing with Prism bricks on the light table. If I give him the whole set he tends to just throw them around (I think this is his way of telling me he's overwhelmed). So I've just been giving him the 2 x 2 bricks. He loves to stack them up over and over again. He also just puts them all one by one on the board that comes in the Prism brick set. As he stacks each brick, I sign and tell him the color.
  
You could also talk about color mixing with the blocks (primary colors, secondary colors, complementary colors).
You can go over the colors of the rainbow.
 
It's funny, we have a ton of Duplo and Mega Bloks that he has never really seemed interested in. But the Prism Blocks seem to hold his attention. Maybe it is the added sensory experience of the light table with them.
I realize that these activities are not innovative in the world of toddler activities. And I know some people do these sorts of things with their kids from the time they are babies. But he is a third kid and was very happy to just play with whatever was around him until he turned 20 months or so. So I just went with it. And now that the girls are both in school all day, I have more time to do these things with him. He also had absolutely no attention span for anything remotely constructive (or maybe it just took me this long to figure out how to engage him for longer than 30 seconds) until recently. He will do these for at least 20 minutes at a time.

What do you do to introduce color to your little ones? :-)

Sunday, February 19, 2012

We were featured!

Dollar Store Mom linked to our suncatcher post today on her blog! I am very flattered that she would like our project and want to link to us!

Saturday, February 18, 2012

Sensory Light Table: Valentine Sensory Bin

I've started working on color recognition with our toddler. Red was the color all last week and I created a Valentine sensory bin for him to play in. He LOVED it! He played with it for a good 25 minutes or so. This is a record for him. Usually his attention span lasts about five minutes and then he moves on.

Included in bin:
--Red colored epsom bath salt (I found 2 lb. cartons at Dollar Tree--dyed with about 12 drops of food coloring)
--'X' and 'O' plastic gems, purple plastic heart gems and pink/red plastic gemstones (all from Dollar area at Target)
--plastic heart containers (all from Dollar area at Target)
--ice cube tray for sorting and collecting
--random scoopers
--funnels (found super cheap at IKEA)

Foil Embossed Canvas

We were inspired by "We Heart Art" this week, it's a great blog with several ideas I filed away (okay I "pinned" them away). As soon as I saw this idea I knew we had to give it a try. I had three 8 x 10 canvases sitting around waiting for a project, which meant I could make one too! :-) All you need is yarn, Glue-All, spray adheasive, foil and permanent markers. Anytime my girls get to use permanent markers they are thrilled so I figured this would be a winner.

For the first step, I asked the girls to create a design with the glue and yarn. I asked them to not make any actual objects (like ladybugs, or people or anything). I just wanted them to create an abstract design.

(edited to add on 10/2/2012)--I have done this project since and discovered that TACKY glue works great to create the lines and it leaves a smooth line to cover. The glue covered yarn was so rough that sometimes it ripped the foil when I covered these. For the new project, I had Ella draw her image on canvas board first with pencil. We went over the pencil likes with the glue. I even went over the glue an extra time to make it a bit "puffier". Let it dry 24 hours and then use a GLUE STICK to attach the foil to the canvas board. This worked FANTASTIC! And I think an easier and quicker process than I describe before. Though, using the yarn and glue is a much more tactile experience. Both processes work, you can just use whatever works best for you. Here is the link to our second project
 
It's so funny how when I give the girls a little leeway, their personalities really come out. My older daughter is very ordered and likes a lot of structure. She is a major rule-follower and likes things to be just so. Can you tell all that in the design she made? :-)
And my other daughter is much more go with the flow and indecisive. She isn't as particular about as many things as my older daughter. Can you see that in her design?
And I think I'm a little bit of both when it comes to my personality. My design ended up being a little free flowing, yet symmetrical. :-)
The next day, I used spray adhesive and covered the canvases with heavy duty aluminum foil. I was a bit nervous about this step because I didn't want to mess them up. There was a bit of a learning curve. I found that it seemed to adhere a bit better if I let the adhesive sit for a few minutes before I covered it with foil. You also have to be careful when you are pushing the foil down in the negative spaces because it can rip fairly easily, even with the heavy duty foil. I actually used a Q-tip instead of my finger to push the foil down. I was afraid my nail might cut into the foil. The Q-tip actually worked quite well.

I also cautioned the kids about pushing too hard with the markers when they were coloring. We ended up letting the first coat of color dry and then they colored a second coat the next day which made the color even brighter. They did a great job! And I'm so excited about how they turned out. I've had this space on our kitchen wall that has needed something ever since we moved in over 5 years ago. And this is how it looks now! Yippee!!