Showing posts with label Light Table. Show all posts

Tuesday, September 25, 2012

Product Review: Prism Bricks vs. Crystal Bricks

I've been meaning to write this review for 6 months now. Oh well, at least I'm finally getting around to it. Back in February I posted about my son playing with transparent blocks on our light table. The first set I purchased was the 84 piece Alex Prism Bricks from Amazon. I was so excited when I ordered them because I thought they would be a great addition to our light table materials. 
Source

They looked great on the light table. The set comes with one clear base to use as well. As we started to play with the blocks, my oldest daughter became increasingly frustrated because the blocks do not stay snapped together when stacked. They merely sit on top of one another. They fall over easily so you have to rebuild your structure over and over again. We were sooo disappointed. I decided to order the Constructive Playthings Crystal Bricks to see if they worked any better. 
Source
When we received them we discovered they snapped together VERY WELL! They actually worked! Even my 2 year old can play with them without being frustrated. I returned the Alex brand crystal bricks. For just a few dollars more you get 50 more bricks with the Constructive Playthings set. You do not receive a base to build on though. The Constructive Playthings bricks do fit on the Alex base so I purchased a set of the the translucent Alex bases(I was able to buy these for quite a bit cheaper than $19) for us to use with the Constructive Playthings bricks
 

That was back in February/March and we are STILL playing with our Constructive Playthings crystal bricks! These are a part of our daily light table play. They get used at least a couple times a week if not daily.

Thursday, September 20, 2012

Toddler Sensory Activity: DIY Slime!

I will admit it, during the summer, my son was in front of the television quite a bit. I have 9 and 7 year old girls and a 2 1/2 year old boy. It's tough to find art activities that will work for all three of them. We did do a few projects all together this summer, but quite a bit of the time, if I was doing something with the girls and it wasn't nap time, poor Kellan was watching a movie. Now, this wasn't all day or anything like that. But definitely more TV watching than I would like. So, now that school is back in session for my girls, I've tried to make a concerted effort to do activities that are on Kellan's level and get him away from the TV. I actually have quite a few to post about, but today's was so fun I had to jump on here and post right away!

We made SLIME! And he LOVED it!

We were inspired once again by The Chocolate Muffin Tree, and her slime exploration post. All you need is the following:
--Glue (either Elmer's white glue or Clear Glue--we used Colorations Clear glue from Discount School Supply)
--water
--bowl
--Borax
--food coloring or liquid watercolor
You mix 3/4 cup warm water and 1 cup clear glue (or elmer's glue) and coloring (we used Liquid watercolor--a few drops was all we needed). We mixed the water and glue in the green measuring cup and then poured it in the bowl mixing the color in there.
How fun is it that there are actually photos of ME doing the project with Kellan! My husband works from a home office and he happened to come up for his lunch today at the same time we were making the slime. He grabbed the camera and took a few photos of me with Kellan. :-)
Then we mixed 1 1/3 cups warm water and 4 teaspoons of Borax in a measuring cup (make sure none of the Borax is inhaled and none of the slime ingested). Then added that to the bowl with the colored glue mixture.
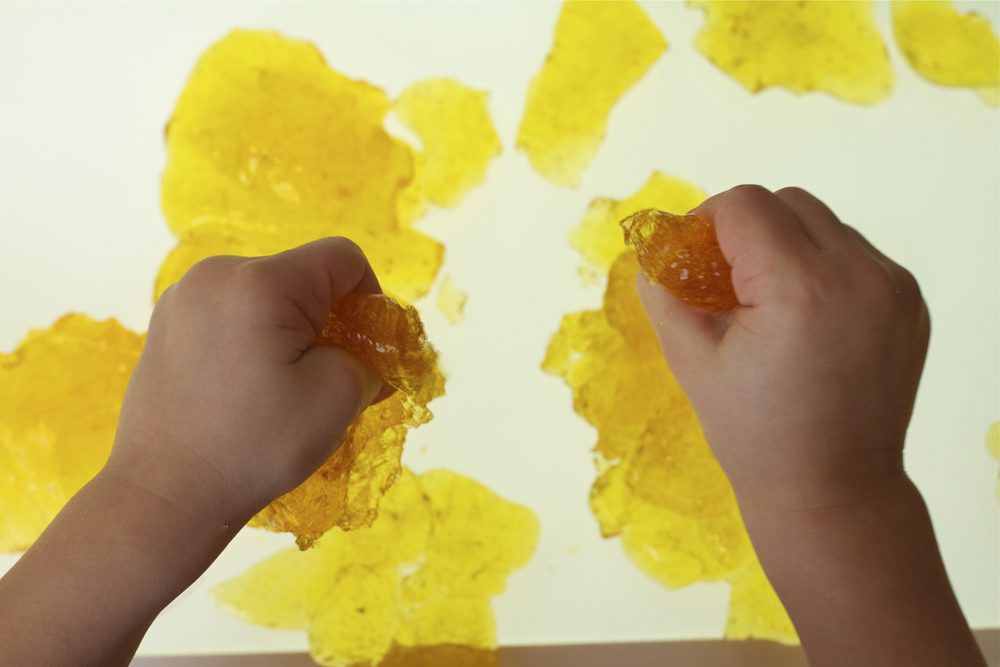
Once you add the Borax mixture, you see results IMMEDIATELY! The slime starts to form right away.
As soon as we had it mixed up pretty well, we took it out of the bowl and played with it on the counter. There was still quite a bit of liquid left in the bowl. I just set that aside. After playing with it for a bit on the counter, I moved him to the light table to play with it! Because we used clear glue, the slime was fabulously transparent and looked AMAZING on the light table!
After playing with it with just his hands for a bit, I got a pumpkin cookie cutter and that worked really well too! The slime is thick enough to "cut".
If I had thought of it while we were playing, I would have grabbed a few black beans for him to make a pumpkin face in the slime. The opaqueness of the beans would have looked really cool on the light table against the transparent nature of the slime! We'll definitely do that next time.
After he was done with the cookie cutter, I gave him a ziploc bowl. He squished the slime in and dumped it out. It held the shape of the bowl! You could make "sand" castles with different size and shaped molds!

After you play with the slime for a bit, it gets sort of crumbly. So we added it back to our liquid in the bowl and kneaded it a bit and it became more liquified again.
All in all this was an incredibly successful activity for my sensory seeking boy! We just put it all back in the bowl and I covered the top with saran wrap. It's sitting waiting for the girls to get home from school. I'm pretty sure my nine year old sensory seeking girl will LOVE this as well!

Wednesday, June 20, 2012

Art & Science Collide: Mad Scientist Experiments

 I like to do science experiments with the girls in the summer and even though we created baking soda volcanoes the previous summer, I came across several posts that inspired me to do a Mad Scientist play experience with the kids. You can see where our inspiration came from in these posts from Growing a Jeweled Rose, and this post and this post from Play at Home Mom.

Here are all of the supplies I gathered:
--vegetable oil
--vinegar
--baking soda
--alkaseltzer tablets
--liquid watercolors
--bubbles
--pipe droppers
--turkey baster
--straws
--measuring cup

We started off with a bin on top of our light table and added some bubbles and liquid watercolor. The kids used straws to blow big bubbles in the solution. We also watched to see how the liquid watercolor moved in the container. We also experimented with smaller straws and bigger straws to see if the bubbles were different sizes.
I cleaned out the bubble solution and added some water. We added vegetable oil and alkaseltzer tablets to watch the liquid watercolor bubble up and make lava lamp type bubbles.
After that, we started making mini baking soda volcanoes in clear plastic glasses. They just kept adding baking soda, vinegar and watercolors over and over again.
Here is a time lapse series of images to see what happens when you pour the vinegar into the baking soda. It worked great because the bin was large enough, the girls could have their own corner and do their own experimenting.
After awhile we picked the cups up to see what they looked like on the bottom:
We didn't realize all that baking soda was still in the bottom so we mixed it up and poured more vinegar in until it was all gone.

I think they could have played with all of this for quite some time. They really had a blast with this activity. And the light table really added to the sensory experience of it all. Highly recommend this!!

Friday, March 2, 2012

Sensory Light Table: A Cover!

My awesome father-in-law made this wonderful cover for our light table!

Isn't it great?!!! Now I don't have to worry about sand, salt, liquid or anything else getting under the plexi cover and onto the light panel. He measured it when he was here a few weeks ago and it showed up on our doorstep on Saturday. I was so surprised and excited to receive it.