I had a WONDERFUL high school senior who helped me out over the summer. She nannied for us once or twice a week and it made my summer so much easier! We all LOVED her! Even though we have one more year to have her sit for us before she heads off to college, I wanted the girls to make her something to say thank you for all the hard work she did over the summer.
Ella wanted to make her a foil embossed canvas like the ones we made for our kitchen wall. We kept it smaller and bought 5 x 7 canvas boards. Lily wanted to make her a button mosaic but I asked her if she'd like to use pony beads instead (we have TONS of pony beads and not so many buttons left). ;-) She said beads worked for her!
I started off by having the girls draw their designs with pencil. Then, Lily glued her beads on the paper and painted her canvas board. When they were both dry, we glued them together and here's her super cute ladybug bead mosaic:
While using glue and yarn for the foil-embossed canvas worked all right, I recently saw a blog post that suggested using glue for the embossed design. I had my 9 year old draw her picture and then I used Discount School Supply tacky glue to go over her pencil design. I thought this would raise up better than using Elmer's school glue or Glue-all. I went over my lines twice. We let it dry and then instead of using spray adhesive to adhere the foil, I used a simple glue stick. It worked FABULOUS!!! And much less messy than spray adhesive. I then used a q-tip to push the foil down around the dried glue. WORKED AMAZING! We will be doing all our foil-embossed projects with this technique from now on!
Here's the foil before she colored it:
And after being colored with Sharpie markers:
LOVE how both of these turned out and our sitter was overjoyed to receive them!
Every summer my kids and I work on one art project a week where they learn about an artist as well as various art techniques and concepts. Join us for our journey into art and art history! The rest of the year we spend crafting and seeing where our creativity takes us!
Showing posts with label First Grade. Show all posts
Saturday, September 15, 2012
Friday, July 20, 2012
2012: Mommy Art Camp--Yarn Bird Nests
I am hoping to put a PDF document together with all of our bird art camp projects in one place for anyone interested (though I'm not sure when I'll get it all done). With this in mind, I am not going to post quite as many photos or go into quite as many how-to details on these projects. But, the projects are fairly self-explanatory. :-)
The girls thought making yarn bird nests was pretty fun. It was so hard for them to wait a day to pop the balloon to see how the nests turned out.
Just a quick note: be really careful when you do pop the balloons, we didn't realize how much they might jump up. But you can see in this photo that the balloon really popped up in the air.
The girls thought making yarn bird nests was pretty fun. It was so hard for them to wait a day to pop the balloon to see how the nests turned out.
Just a quick note: be really careful when you do pop the balloons, we didn't realize how much they might jump up. But you can see in this photo that the balloon really popped up in the air.
Monday, July 16, 2012
2012: Project 3--One Point Perspective
I felt like my girls were ready for a bit of a drawing lesson as opposed to just learning about various artist's styles and techniques. So we tried one-point perspective a couple weeks ago after I found this great lesson from the smART Class blog.
I started off showing them a bunch of different artworks from different time periods. We started with some photographs I found through google images (sorry for the lack of source info, I just googled "perspective photos" and I will post some links at the bottom of this).
I started by talking about specific terms with them: perspective, horizon line, and vanishing point.
Then I showed them the image below and how all the lines in the image all lead to the vanishing point.
I showed them all the following images, asking them to point out the horizon line and vanishing point. I pointed out the sky, ground, buildings or trees on the sides of the images.
Then I got a little tricky with the next two, but my smarties got that the vanishing point wasn't always in the same spot. ;-)
Then we moved on to slightly more modern art:
And one of my favorite artists, Edward Hopper
Lily's perspective drawing! She's only 6 years old (almost seven) so I didn't get particular about showing her the horizon line.
And here's Ella's! I pointed out the horizon line to her and she grasped the idea pretty easily.
I started off showing them a bunch of different artworks from different time periods. We started with some photographs I found through google images (sorry for the lack of source info, I just googled "perspective photos" and I will post some links at the bottom of this).
I started by talking about specific terms with them: perspective, horizon line, and vanishing point.
Then I showed them the image below and how all the lines in the image all lead to the vanishing point.
I showed them all the following images, asking them to point out the horizon line and vanishing point. I pointed out the sky, ground, buildings or trees on the sides of the images.
Then I got a little tricky with the next two, but my smarties got that the vanishing point wasn't always in the same spot. ;-)
To the left in the boat image and in the middle in the image below.
I showed them some Renaissance art paintings:
![]() |
| Raphael's "School of Athens", 1518 |
![]() |
| DaVinci's "Last Supper", circa 1495 |
![]() |
| Edvard Munch's "The Scream", 1893 |
![]() |
| Edward Hopper, "Gas", 1940 |
![]() |
| Edward Hopper, "Chair Car", 1965 |
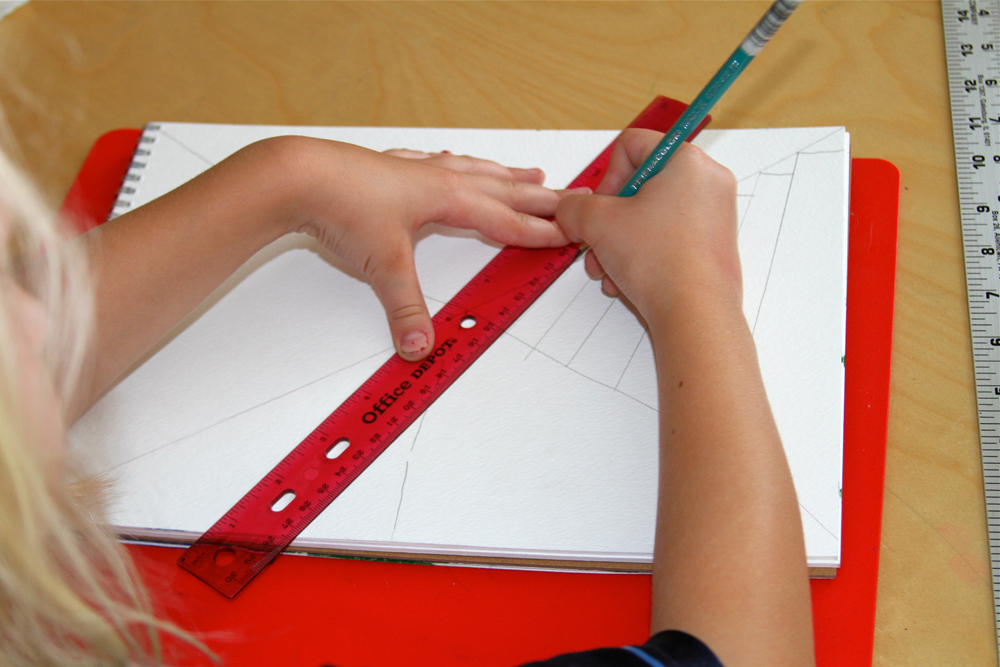
Finally, I showed them images from the smART class blog assignment dividing the paper into four quadrants separated by diagonal lines.
After the girls made their diagonal lines, they filled in the right side with buildings...
...the left side with trees....
Then sky in the middle on the top and a street in the middle on the bottom.
![]() |
| Hard at work in the art room. |
And here's Ella's! I pointed out the horizon line to her and she grasped the idea pretty easily.
They really liked this project and have made pictures with this same technique since we've done this. A success as far as our summer projects go!
Monday, June 25, 2012
2012: Project 2: Matisse Drawing with Scissors
Our project today went slightly better than the last one. However, there is an interesting dynamic now that the girls are getting a bit older. My older daughter didn't want my younger daughter looking at her project. So I had to put a board up between the two of them. *sigh* It's always something. But both of them finished the project today and I'm very pleased with how they turned out. I think they enjoyed it so it was a success in my book.
Our artist today was once again Henri Matisse. We created "Egyptian Curtain" projects last year and this year I came across two things that inspired us. First, I received a FABULOUS set of books at Christmas this year: the Smart About Art series. These are amazing books for grade school kids. Each book is set up as if a student is writing a report on the artist. The "child author" takes you briefly through the major events in the artist's life, the themes in the artist's work, the colors used, and more. Very elementary, yet informative. I HIGHLY recommend these books. Today, I pulled the Matisse book down from the shelf and read the last half of the book to the girls. This portion of the book discussed Matisse's health struggles later in life. It described how he resorted to using scissors and making wonderful paper collages when he could no longer stand to paint for hours. He would cut the paper and instruct his assistants where to attach them to the artwork. Besides this lovely little book, we were also inspired today by this post at Mrs. Knight's Smartest Artists.
I showed the girls several images of Matisse's cut paper work:
They each had their own set of construction paper (an entire pad of construction purchased at the Dollar Store!!), a clear glue roller, pair of scissors and their art journal.
I told them they could make anything. They could try making an ocean themed collage like those in the post on Mrs. Knight's blog or they could go on their own and make anything they wanted. But I told them I didn't want it to be a "real" picture of something. This was my way of letting them know I didn't want something literal. They asked if they could draw it out first with pencil on the construction paper. I told them that I thought it would be neat if they just used the scissors, but if they felt they needed to draw it out first that would be okay. They both decided to just use the scissors. ;-)
I really like these next two pictures because they really show how into the process they got:
Ella had to stand she was so into what she was doing. And below, you can see paper all around Lily. Sort of reminds me of the photo of Matisse that I showed the girls where he has paper all over the floor by him. :-)
And here are their finished masterpieces:
Above: Entitled "Jazz" by Ella. She told me all about her rainbow color theme. The aliens are dancing. The very top purple circle with the little rainbow colored dots is a disco ball. The rest of the top half she said was just white space and she wanted to fill it so she just placed the paper how she wanted.
Lily decided to call hers "Candyland". Do you see the candy corn on the lower right side? The other smaller orange triangles are baby candy corns. The hearts are candy hearts (like conversation hearts). There's a candy cane. The purple shapes are chocolate eggs and the red circle is a cherry lifesaver. Oh, and the pink squares are strawberry Starburst. Isn't that awesome?!
You know what I loved about the girls creations? They both truly knew exactly what they were doing as they went along. They both picked a theme completely on their own, not influenced by me; not influenced by Matisse's artwork themes (other than Ella calling hers Jazz....Matisse did create a book of art called Jazz). These were truly their own art ideas. I LOVE LOVE LOVE that!
I showed the girls several images of Matisse's cut paper work:
![]() |
| Sorrow of the King, 1952 |
![]() |
| Polinesia, The Sky, 1947 |
![]() |
| Panel with Mask, 1947 |
I told them they could make anything. They could try making an ocean themed collage like those in the post on Mrs. Knight's blog or they could go on their own and make anything they wanted. But I told them I didn't want it to be a "real" picture of something. This was my way of letting them know I didn't want something literal. They asked if they could draw it out first with pencil on the construction paper. I told them that I thought it would be neat if they just used the scissors, but if they felt they needed to draw it out first that would be okay. They both decided to just use the scissors. ;-)
I really like these next two pictures because they really show how into the process they got:
Ella had to stand she was so into what she was doing. And below, you can see paper all around Lily. Sort of reminds me of the photo of Matisse that I showed the girls where he has paper all over the floor by him. :-)
And here are their finished masterpieces:
You know what I loved about the girls creations? They both truly knew exactly what they were doing as they went along. They both picked a theme completely on their own, not influenced by me; not influenced by Matisse's artwork themes (other than Ella calling hers Jazz....Matisse did create a book of art called Jazz). These were truly their own art ideas. I LOVE LOVE LOVE that!
Monday, July 11, 2011
2011: Art Project 4--Foam Mosaics
Well, not every project can be a complete success, right? I should have skipped the week after Fourth of July for our art project. We had tennis in the morning on Tuesday so we were doing the art journal project in the afternoon after a full weekend of busy days and late nights. Not a good combination at all! But I decided to post the project idea anyway, even if I don't have finished project photos.
I thought the girls would absolutely LOVE this idea. I spent over an hour cutting up foam into little pieces they could use to make mosaics. Ella especially loved the button mosaics last summer so I thought this would be a big hit. I tried to make the mosaic pieces so they weren't too small, I didn't want them to get discouraged by the project taking too long. I found these 6" x 9" foam pieces in a set at Michael's on clearance. These were quite a bit cheaper than the buttons were. I still have a ton left over that I didn't cut up yet so a little goes a long way.


I think part of the problem with this project is that I left it completely 100% open. They could make ANYTHING. I think that was a bit overwhelming after our weekend festivities. So, if I did this again, I would give them a bit more direction on what to make.
Lily decided to work on a butterfly and Ella wanted to make a vase of flowers similar to the Van Gogh project we did a few weeks ago. It all started off fine, but then Ella tried to erase some of her pencil lines but glue had mixed in with them and they wouldn't erase. She wasn't happy about this and abandoned her project. It's too bad too because I think her mosaic was looking really cool! I kept it hoping maybe she'll want to finish it at some point. Once Lily saw that Ella wasn't going to finish hers, she decided she didn't want to finish hers either. So we had two unfinished projects last week, but a fun idea in theory! :-)
I thought the girls would absolutely LOVE this idea. I spent over an hour cutting up foam into little pieces they could use to make mosaics. Ella especially loved the button mosaics last summer so I thought this would be a big hit. I tried to make the mosaic pieces so they weren't too small, I didn't want them to get discouraged by the project taking too long. I found these 6" x 9" foam pieces in a set at Michael's on clearance. These were quite a bit cheaper than the buttons were. I still have a ton left over that I didn't cut up yet so a little goes a long way.


I think part of the problem with this project is that I left it completely 100% open. They could make ANYTHING. I think that was a bit overwhelming after our weekend festivities. So, if I did this again, I would give them a bit more direction on what to make.
Lily decided to work on a butterfly and Ella wanted to make a vase of flowers similar to the Van Gogh project we did a few weeks ago. It all started off fine, but then Ella tried to erase some of her pencil lines but glue had mixed in with them and they wouldn't erase. She wasn't happy about this and abandoned her project. It's too bad too because I think her mosaic was looking really cool! I kept it hoping maybe she'll want to finish it at some point. Once Lily saw that Ella wasn't going to finish hers, she decided she didn't want to finish hers either. So we had two unfinished projects last week, but a fun idea in theory! :-)
Tuesday, June 28, 2011
2011: Art Project 3--Kandinsky Color Studies
Today, we focused on the artist Wassily Kandinsky. One of my favorites when it comes to more modern and abstract art. Though sometimes abstract art seems more simplistic, there was much theory behind Kandinsky's art. He used music as inspiration. He named his more quick and spontaneous works "Improvisations" and his more thoughtful and thorough works were "Compositions".
He often used primary colors and complimentary colors. He also used mathematical themes in his works.
Here are a few of his paintings:
Improvisation No. 31, Sea Battle, 1913
Composition VII, 1913
Composition VIII, 1923
Kandinsky's Color Studies:

For this project, I was inspired by The Art Fairy's post about warm and cool color exploration. And also, this color study post on the Quest Artists blog.
I gave the girls a choice between making circles or diagonal lines. Lily chose circles and Ella chose diagonals. We were supposed to do a warm/cool color exploration last year with our hand drawings, but the kids weren't so into that project. So for this project I really wanted to try and stick to them understanding the color wheel and making thoughtful choices about what colors they put where. I drew this crude color wheel and reminded the girls what complimentary colors were and we also talked about warm and cool colors.
(Hee hee...like my horrible version of a fire and raindrops/snowflakes so my preschooler would know which side was warm and which was cold?) :-)
For Lily's circle project:
I asked her to pick one color for the middle of a circle. Then, she could pick any other color she wanted to color the next ring of the circle. For the third ring, she had to mix the first two colors together. The fourth ring consisted of an "opposite" temperature color. So if she had used warm in the middle of the circle, she had to use cool on the outside and vice versa. Then for the background color, I asked her to use the same temperature but a different color as the fourth ring. She used watercolor pencils for the rings and then either markers or slick stix for the background color to make it pop more.

Here is her creation, first with just the colored pencil, and then with the water added:


For Ella's diagonal project:
She got to practice her ruler skills making diagonal lines that ended up matching up on the ends in four different quadrants. For coloring in: I told her we were NOT going to make a pattern with the colors, but a pattern with the temperature of the colors. In each quadrant, she had to alternate using warm and cool colors. And I asked her to really try and use a lot of different colors and not use the same color in the quadrant across from each other. Usually, Ella is not too receptive to taking direction from me, but I told her this was what the project was today and she ran with it! And actually asked my advice sometimes on which color to do next. I LOVE how this turned out and I loved watching her make this work of art. She thought so hard about her color choices and took her time. So fun to see!

In the spirit of Kandinsky, we listened to music while we worked on this project. :-)
Ella's finished product in colored pencil and then after water was added:

He often used primary colors and complimentary colors. He also used mathematical themes in his works.
Here are a few of his paintings:
Improvisation No. 31, Sea Battle, 1913
Composition VII, 1913
Composition VIII, 1923Kandinsky's Color Studies:


For this project, I was inspired by The Art Fairy's post about warm and cool color exploration. And also, this color study post on the Quest Artists blog.
I gave the girls a choice between making circles or diagonal lines. Lily chose circles and Ella chose diagonals. We were supposed to do a warm/cool color exploration last year with our hand drawings, but the kids weren't so into that project. So for this project I really wanted to try and stick to them understanding the color wheel and making thoughtful choices about what colors they put where. I drew this crude color wheel and reminded the girls what complimentary colors were and we also talked about warm and cool colors.
(Hee hee...like my horrible version of a fire and raindrops/snowflakes so my preschooler would know which side was warm and which was cold?) :-)I asked her to pick one color for the middle of a circle. Then, she could pick any other color she wanted to color the next ring of the circle. For the third ring, she had to mix the first two colors together. The fourth ring consisted of an "opposite" temperature color. So if she had used warm in the middle of the circle, she had to use cool on the outside and vice versa. Then for the background color, I asked her to use the same temperature but a different color as the fourth ring. She used watercolor pencils for the rings and then either markers or slick stix for the background color to make it pop more.

Here is her creation, first with just the colored pencil, and then with the water added:


For Ella's diagonal project:
She got to practice her ruler skills making diagonal lines that ended up matching up on the ends in four different quadrants. For coloring in: I told her we were NOT going to make a pattern with the colors, but a pattern with the temperature of the colors. In each quadrant, she had to alternate using warm and cool colors. And I asked her to really try and use a lot of different colors and not use the same color in the quadrant across from each other. Usually, Ella is not too receptive to taking direction from me, but I told her this was what the project was today and she ran with it! And actually asked my advice sometimes on which color to do next. I LOVE how this turned out and I loved watching her make this work of art. She thought so hard about her color choices and took her time. So fun to see!

In the spirit of Kandinsky, we listened to music while we worked on this project. :-)
Ella's finished product in colored pencil and then after water was added:

Subscribe to:
Posts (Atom)