Every summer my kids and I work on one art project a week where they learn about an artist as well as various art techniques and concepts. Join us for our journey into art and art history! The rest of the year we spend crafting and seeing where our creativity takes us!
I honestly do not know how I stumbled upon this AMAZING toy on Barnes & Noble. I was looking up something and ended up looking through their toy section online. I had a gift card and I'm constantly on the lookout for things that would look cool on our light table and would be engaging for all my kids. This looked like it fit the bill.
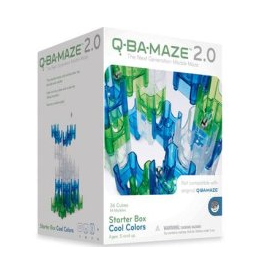
I didn't really know what I was getting except it was translucent and a marble run. Ok, sounds fun to me. I just purchased the Cool Colors Starter Set because I wasn't sure how it would go over or how easy it would be to play with. Oh my gosh, this is the best toy I have ever purchased! Seriously, so much fun, yet, completely creative and educational. I suppose I am stretching it just a tiny bit writing about this on an art blog. But honestly, Q-Ba-Maze encourages children to use a TON of creativity! They can build their own marble runs, thinking about structure and architecture. Not only do they have to be creative, but also use ideas from physics and engineering. We had a regular plastic marble run like this:
It's a great toy, but I did find that my girls couldn't make large structures on their own because it was very intricate to put together and get the marbles to run smoothly. They often had a tough time making their structures stable with the old marble run. Q-Ba-Maze pretty much works no matter how you set it up. We pulled it out of the box and the girls took turns adding and creating a structure together.
Once they had tried this out, they decided to make the moose structure from the instructions included in the box.
Though, I don't have a photo of him, even my 2 year old likes dropping the marbles into the structures. Granted, this toy is rated for 5 years and up. But I think any age can enjoy dropping the marbles into the run (of course, the marbles are small so you have to be careful they don't put them in their mouth). And by the way, doesn't it look cool on the light table?!
The girls have played with this several times already. We discovered more instruction plans online here. At first the grid-like plans seemed really confusing and difficult to interpret. But once we really looked at them, they are not hard at all. Both my 6 and 8 year olds were able to navigate them. They created the heart (shown at the top of this post) and the robot.
We even conducted a little experiment with the robot. There are four potential places the marbles can end up at the bottom. So we dropped each marble in the center drop spot and recorded where each one landed. Then we moved my daughter's position (left of the robot, right, center) to see if where she was sitting would change where they marble fell. I had her predict where she thought the marbles would go and if anything would change by her changing position. Overall, they ended up on the left-side more. So maybe our floor leans that way. ;-) We had a lot of fun with it!
And finally, here is one of the sculptures my 8-year old created on her own.
Overall, I could not be happier with this product and my oldest has already decided she needs to save up for the Big Box Set so she can make even bigger structures! This is a MUST-HAVE on any kid's wishlist for this year!
Here's a video that shows the owner/creator talking about Q-Ba-Maze and I was even more delighted to learn that this was created right here in the Twin Cities! I LOVE supporting local products!
Today we had an architecture lesson involving stained glass windows. First I showed the girls this window from Almudena Cathedral in Spain. We talked about what stained glass windows are used for.
Ella said, "Besides being pretty, they tell stories." I told her she was exactly right! I told the girls that there are some churches that are very, very, very old and that when those churches were built not everyone could read words so the windows told stories from the Bible. That way if people couldn't read, they could still know what the Bible said. I also showed them this more contemporary window I found in Google Images (have no idea the location).
This window is from a church in Germany, "Himmelfahrtskirche" Dresden-Leuben, (1901):
I asked the girls what the shape of the window looked like. Lily said it looked like a flower. I said, "Yes, this is called a rose window!" And many churches have variations of the rose window. Two more famous rose windows:
We also talked about other examples of stained glass. I introduced them to the Midwestern architect Frank Lloyd Wright, showing them this picture of the Robie House in Chicago, Illinois (1909). We talked about the job of an architect and what they do. I pointed out where the stained glass windows were in the house and then showed them some interior examples.
This (below) was from the Coonley Estate playhouse designed by Frank Lloyd Wright in 1912. These windows were in a children's playroom so he designed them using bright colors which he didn't normally use. He called the windows a "Kinder-Symphony". The girls mentioned that this window reminded them of the Mondrian project we worked on last year.
And this last part of the lesson was just a fun way to show the girls how big a stained glass window could be and how it was installed (at least nowadays!).
The window exterior
Putting in the framing
A picture of the the front window in relation to the whole church.
The church is St. Mary's Catholic Church in Potsdam, NY.
I know that was a lot of images, but the girls really enjoyed them all so I thought I would post them. Now onto our project for today, inspired by this lesson from The Art Fairy's blog. I just googled stained glass coloring sheets and found a few images for my girls to pick from, then printed out the images they wanted. I had them use permanent markers to color them in. They always get excited whenever they are allowed to use permanent markers. :-)
All finished coloring in:
Next, I mixed black tempura paint with Glue-all (using smaller bottles so the girls would have a little more control).
The girls started outlining the black lines with black glue:
They both got a little frustrated though and were worried about "messing up" their projects so I finished up the black glue for them.
The only thing I found frustrating about this project is that the black glue had bubbles in it (not sure if that came from the mixing/stirring we did to create it). And they were difficult to pop right away. You had to wait for the black glue to harden up just a tiny bit before using a toothpick to pop them. Here's an example of one:
After the black glue dried, I folded black construction paper in half and used an Exacto knife to cut circles out. Then glued the girls' pictures inside.
Here are the finished projects hanging in my kitchen window with light shining through:
Lily's Fish
Ella's Flowers
Very fun project! I think we would do this again sometime. As the girls get a bit older, I think they'll be able to handle the black glue better and they will enjoy it more.
 I honestly do not know how I stumbled upon this AMAZING toy on Barnes & Noble. I was looking up something and ended up looking through their toy section online. I had a gift card and I'm constantly on the lookout for things that would look cool on our light table and would be engaging for all my kids. This looked like it fit the bill.