Showing posts with label flower pots. Show all posts

Wednesday, July 2, 2014

Our Garden Art 2014

Our house is located on the corner of our subdivision. It's actually a really busy corner and one of just a few access points for our neighborhood, so MANY people turn in and drive by our front yard everyday (sometimes multiple times a day). I feel a certain amount of responsibility to represent our neighborhood well and always like our front landscape bed to look nice. Plus, I just enjoy making our yard look pretty! Here is this year's version of our garden art!


I feel I have finally discovered how to make a DURABLE painted flower pot! One of our pour-paint pots from last year did survive and I have that by our front door this year:
I didn't seal the inside or the outside of our flower pots last year with pottery sealer. And I didn't seal the outside right away with polyurethane spray so by the end of the summer the paint was bubbling up and peeling off. I learned from this and have improved our technique this year.

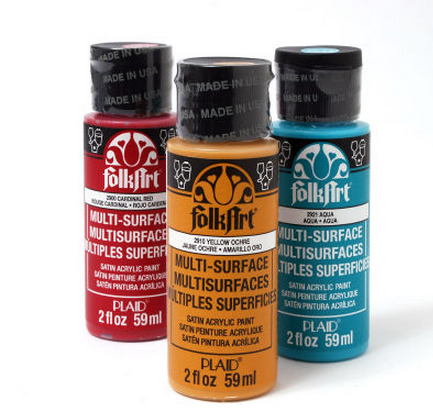
The paint we used this year would not be good for pour-paint unless thinned because it is too thick to run down the sides of the pot. You would also have to buy quite a bit of paint to achieve the pour paint look. HOWEVER, this paint is EXCELLENT for painting designs on the pot!

Photo credit: Decoart

Photo credit: Michaels
Both of these brands of paint worked great! And have withstood over 5 inches of rain in the month of June alone. The only difference is that the Folk Art covers more quickly and the Patio Paint requires multiple coats to cover completely.

Before we did anything this year, I sealed the inside and the outside of our pots with Pottery Sealer like this from Michaels:
Photo credit: Michaels
Here are our painted masterpieces for this year:
My painted pot

My 10 year old working on her pot. She came up with this absolutely AMAZING impressionist-type paint style that turned out just GORGEOUS! I cannot begin to tell you how much I love love love this pot! And how impressed I was with it!
Her work space!
Finished pot in the landscape bed.
After we painted the pots and they dried, I sealed them with the pottery sealer again and then one last protective coat of polyurethane spray. That seemed to do the trick as this paint has lasted amazingly well so far this summer!

I also used the paint above to paint this garden lantern:
It was white when I purchased it from Michael's. I used alcohol ink on the glass. You can see it partially done in the photo below:
I painted the lantern and then sealed the whole thing with polyurethane spray. The alcohol ink has stood up to the weather elements, but it has faded a bit from the sun. Overall, I'm pleased with how well it's standing up to nature.
The landscape bed when we first finished it this spring.
We also created a couple pots to gift to people. I think these turned out really fun!
My 8 year old's pot.
I used our "created by" stamps to label the bottom of the pots by painting the stamp with the patio paint and then spraying the bottom with polyurethane spray.
Happy Fourth of July! Hope you all have a wonderful holiday this week!!

Tuesday, May 15, 2012

Handmade Holiday: End of the Year Teacher Gifts

Here is what our End-of-the-Year teacher gifts will look like this year:
They will receive a small pour-painted flower pot, an alcohol ink painted tile coaster, and a handmade card (alcohol ink stamped onto glossy scrapbook paper) with a note that says:


Thank you for helping me "grow" and "coast" 
through kindergarten this year! 
I had a wonderful year with you!

Craft Project: Pour Paint Flower Pots

What a fun project this was!! Along with the alcohol ink coasters we made, we created some pour paint pots to also give the girls' teachers. This project was sooo easy! Though it did take a tiny bit of experimenting to get the whole flower pot covered, but if you aren't particular about the outcome, it's so easy!

These two posts inspired us from Dilly-Dali Art and In Lieu of Preschool. Both of their projects turned out amazing! They created larger pots than we did. Ours were just 3" diameter terracotta pots, perfect for a pencil holder (or a very small window sill plant).

Here's what you need:
 I got both the metallic and glitter Creatology Tempera Paint from Michael's. This paint worked AWESOME! I highly recommend it.
I taped the hole in the bottom of the pot. You'll see later in the post, but once you start pouring the paint, it seems as if you'd never be able to get the tape off. The paint is so thick. But once it is dry, the paint really thins out and you can easily remove the tape.
I learned from Genny at In Lieu of Preschool that suspending the pots works well. And boy does it! We used our Colorations BioColor paint bottles to suspend the pots. You'll see in other pictures, I wrapped a paper towel around the bottle before putting the pot on and it worked really well!

I was able to do this project one on one with my girls, which I think was a good thing in hind sight. Both Aleacia from Dilly-Dali Art and Genny advised that less is more when it comes to squeezing the paint. I think if both girls were doing this at the same time, we would have had more paint poured than we needed. :-)
All you have to do is pick your colors and start pouring them one by one into the center of the pot. As the paint covers the bottom of the pot, it will begin to pour over the side in layers.
 
My older daughter (pictured above) didn't want me to help at all so I just let her go and didn't offer any suggestions or anything. My younger daughter was a little more amenable to my suggestions. Instead of just letting the paint fall where it wanted, we let it pool a bit.
Then I picked up the paint bottle it was suspended on and tipped it just a bit to get the paint to cover the bare spots on the pot. We repeated this technique a few times to get most of the pot covered.
 

We went from this:
To this:
I absolutely LOVE LOVE LOVE how they turned out! We will definitely be doing this project again. Quick, easy, and beautiful result!