We actually created this project months ago. The girls had a no school day back in February and I kept them busy with art projects that day. One of them was watercolor salt paintings! This is a relatively easy project to do and the girls really seemed to enjoy it! It would be a short quick-drying project to do as a birthday craft as well.
What you need:
--watercolors (I like liquid watercolors, I think they are much more vibrant)
--table salt
--watercolor paper
--blue painters tape (optional)
Start by having the kids block off a design on the watercolor paper with the blue tape.
Here are their taped off designs:
Then just fill in a section with watercolor paint. We found being liberal with the paint/liquid worked best. After doing a small section, sprinkle a little salt on the paint and move on repeating the process in the next area.
And here are the finished wet paintings with the tape still on:
My nine year old's:
My seven year old's:
Here is the one I made. :-)
And here they are with the tape removed:
And just for fun, here's a close-up:
This was a really fun project because not only is it artistic, but scientific too! I explained to them about how salt is a dessicant and sucks up the water/liquid. They thought this was such a neat thing to see! You can see the speckling happen as it dries.
Once the projects are dry, just remove the tape, brush the salt away and enjoy your beautiful artwork!
Every summer my kids and I work on one art project a week where they learn about an artist as well as various art techniques and concepts. Join us for our journey into art and art history! The rest of the year we spend crafting and seeing where our creativity takes us!
Showing posts with label Watercolor. Show all posts
Wednesday, July 3, 2013
Wednesday, July 18, 2012
2012: Project 4: James Rizzi-Inspired Birds (Bird Art Camp)
My girls have taken part in many, MANY art camps in the last few years around where we live in Eden Prairie: at Kidcreate Studio and the city's Art Center.
Everything from Journey through Art, Art Around the World, Pinkalicious
and Friends, Dress Up Camp, Lego Loco Art camp, Fairy Camp, Angry Birds
Art, and more. They are in a few camps this summer as well, but I
decided after spending two summers doing art projects with the girls and
seeing so many fun projects on Pinterest that I would attempt my own
form of Mommy Art Camp. We usually do one art project a week here at
home because we have so much going on. But I picked this week and
blocked off enough time to do four days of art projects all relating to
birds. AND, to top it off we are going to make a trip to the MN Zoo on
Thursday to tie in our Science Friday (albeit on Thursday) activity with
it. It won't be too exciting, but we're going to pay extra attention to
all the different types of birds we see while we're there.
At first, I planned one project for each of the four days, but the girls were pretty excited about the whole thing, so I quickly threw together an extra project on Monday. I have since planned other projects so that we're doing a couple things each day.
I gave them their art journals and showed them several images of James Rizzi's (1950-2011) art work. He was a New York artist whose pop art style was fun and whimsical. The girls thought his buildings in Germany and his stained glass window in a shopping center were really cool. But they loved the rest of his art too. We had fun looking for birds throughout his work.
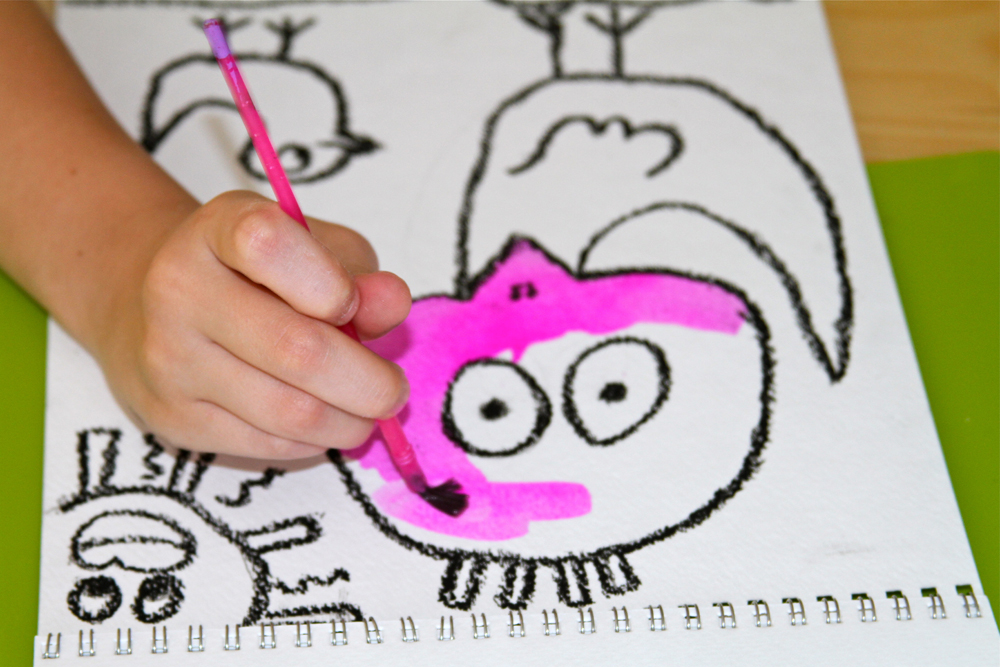
Once we had looked at the images, I used Deep Space Sparkle's Rizzi birds art lesson as a guide and showed the girls how to draw a bird in Rizzi's style. We were also inspired by this image from Cedar Creek Elementary on Artsonia. They used pencil and then I outlined their drawings in pastel for them. I typically would let them do the outlining, but I knew from past experience that it is difficult for them to outline with pastels without smearing it on the page. I wanted to keep them happy and in good moods without thinking they had "messed" up their artwork. They also didn't object to my outlining or I would have let them do it. After this step, they used liquid watercolors to paint the birds in bright fun colors.
And here are their finished Rizzi-inspired birds:
The girls liked this project. They have both drawn this style of bird on different paper when they were creating on their own in their rooms. :-) And I learned about a new artist too! I hadn't heard of James Rizzi before and really think is art work is quite fun and would be an awesome theme for a child's bedroom.
At first, I planned one project for each of the four days, but the girls were pretty excited about the whole thing, so I quickly threw together an extra project on Monday. I have since planned other projects so that we're doing a couple things each day.
I gave them their art journals and showed them several images of James Rizzi's (1950-2011) art work. He was a New York artist whose pop art style was fun and whimsical. The girls thought his buildings in Germany and his stained glass window in a shopping center were really cool. But they loved the rest of his art too. We had fun looking for birds throughout his work.
![]() |
| Happy Rizzi House, Germany |
![]() |
| Rizzi Cupola in shopping center dome. |
Once we had looked at the images, I used Deep Space Sparkle's Rizzi birds art lesson as a guide and showed the girls how to draw a bird in Rizzi's style. We were also inspired by this image from Cedar Creek Elementary on Artsonia. They used pencil and then I outlined their drawings in pastel for them. I typically would let them do the outlining, but I knew from past experience that it is difficult for them to outline with pastels without smearing it on the page. I wanted to keep them happy and in good moods without thinking they had "messed" up their artwork. They also didn't object to my outlining or I would have let them do it. After this step, they used liquid watercolors to paint the birds in bright fun colors.
![]() |
| I drew out each set on the chalkboard while the girls followed along. |
![]() |
| Outlining finished! |
![]() |
| Starting to paint |
![]() |
| I actually preferred the contrast with the lime green, but Lily wanted to mix colors for the background. I didn't say anything and she went on her merry way. ;-) |
![]() |
| My six year old's. The background turned out pretty darn cool! I also love the expression on her sun. :-) |
![]() |
| My eight year old's. So cute! |
Monday, July 25, 2011
2011: Art Project 7: Paul Klee Castle
Although we just worked on the Chihuly project a few days ago, we worked on this week's project today. We're traveling later this week and didn't have much going on today so figured it would be the perfect afternoon activity. This week we focused on Paul Klee. He was a Swiss Expressionist and taught with Kandinsky at the German Bauhaus school. He loved color theory and taught it at the school. He was also very musical as a child and ended up marrying a pianist. No wonder he was friends with Kandinsky! :-)
Here are a few of his works:
The Rose Garden, 1920
I asked the girls what they saw in this picture. They said "flowers!" and then I asked them to show me the stems which they could. And one of them said, "He likes to use shapes."
Red Balloon, 1922
Before I told them the name of this image, I asked them what they saw. My younger daughter said, "A red balloon!" And I told her she was absolutely right and that it was the name of the artwork. She was very pleased with herself. ;-)
Flora on the Sand, 1927
"More shapes and lots of colors."
Blue Nacht, 1937
This was Ella's favorite. She said right away she liked it because it was her favorite color, BLUE!
Castle and Sun, date unknown
I've seen the project we worked on today in various forms throughout the blogosphere. But we followed a modified version of Mrs. Art Teacher's lesson. :-) Instead of having the girls make all their own shapes with a ruler, I cut out out shapes from cardboard in our recycling bin so they could use them to trace.


I left this image up on the computer for them to use as a guide:
After tracing all their shapes, they went over their pencil lines with a crayon:

Then painted in each shape with watercolor paints. Per Mrs. Art Teacher's suggestion, I told them to paint one shape and then jump to another spot on the page to do a new shape/color. This helped keep the colors from mixing.


And finally, they painted the black around the outside.

Here are their final projects:
The girls really liked this project. I think it was a nice easy one to follow our very lengthy and intricate Chihuly project. This project could also be modified in a number of ways for younger artists. You could leave out the painting all together. Cut different shapes out of construction paper and have the child assemble their castle on black paper by gluing the shapes in place. You could also make this a three-step project over several days for younger kids with shorter attention spans. Have them draw the shapes one day and trace with crayon, have them paint the shapes another day, and then have them paint the black on the last day.
Here are a few of his works:
The Rose Garden, 1920I asked the girls what they saw in this picture. They said "flowers!" and then I asked them to show me the stems which they could. And one of them said, "He likes to use shapes."
Red Balloon, 1922Before I told them the name of this image, I asked them what they saw. My younger daughter said, "A red balloon!" And I told her she was absolutely right and that it was the name of the artwork. She was very pleased with herself. ;-)
Flora on the Sand, 1927"More shapes and lots of colors."
Blue Nacht, 1937This was Ella's favorite. She said right away she liked it because it was her favorite color, BLUE!
Castle and Sun, date unknownI've seen the project we worked on today in various forms throughout the blogosphere. But we followed a modified version of Mrs. Art Teacher's lesson. :-) Instead of having the girls make all their own shapes with a ruler, I cut out out shapes from cardboard in our recycling bin so they could use them to trace.


I left this image up on the computer for them to use as a guide:
After tracing all their shapes, they went over their pencil lines with a crayon:

Then painted in each shape with watercolor paints. Per Mrs. Art Teacher's suggestion, I told them to paint one shape and then jump to another spot on the page to do a new shape/color. This helped keep the colors from mixing.


And finally, they painted the black around the outside.

Here are their final projects:
The girls really liked this project. I think it was a nice easy one to follow our very lengthy and intricate Chihuly project. This project could also be modified in a number of ways for younger artists. You could leave out the painting all together. Cut different shapes out of construction paper and have the child assemble their castle on black paper by gluing the shapes in place. You could also make this a three-step project over several days for younger kids with shorter attention spans. Have them draw the shapes one day and trace with crayon, have them paint the shapes another day, and then have them paint the black on the last day.
Subscribe to:
Posts (Atom)