Anyone who has followed this blog for any length of time knows we LOVE sun catchers or anything pretty and sparkly in a window. :-) A year and a half ago, we worked on a faux stained glass project with black glue and permanent markers. The girls' projects have been hanging in my kitchen window over the sink ever since. I decided it was time for something new to look at. :-) We had a teacher workshop (no school) day at the end of February, and inspired by this post at Play at Home Mom, I thought this would be the perfect project for the girls.
What you'll need for this project:
--pictures frames (any size)--I got ours at Dollar Tree, we used 8 x 10
--clear glue
--Glass mosaic tiles or gems--We used the glass tiles and gems shown below from Michael's at $2.99 a bag. I think we used 4-5 bags total with some of certain colors leftover). You can also buy glass gems at Dollar Tree. At our Dollar Tree, the colors are limited to blue and green and maybe clear. I wanted a greater variety in color for the girls so I shelled out for the Michael's brand. ;-)
--Gorilla Glue
--suction cups (also found at the dollar store)
--sorting dish (optional)--you can even have the children sort the tiles/gems by color as an added educational activity. I found my tray at the dollar store as well.
This project is GREAT for all levels as you can do as much or as little to help the kids with it. Since my girls are 9 and 7, I let them do most of it. If you are adapting it for smaller children you can just let them put the gems wherever, and either add the glue yourself or let them do it. I have somewhat perfectionist little artists, so I had them plan ahead.
Step 1) This is actually for the parent. I used gorilla glue to go around where the frame and the glass would meet to create a seal. This way, when the clear glue is applied, it will not leak. I didn't take a photo of this step before we were finished. You can see it below in the photo that shows the finished underside with the suction cups. I did this step the day before I wanted the girls to do the project so the glue would have time to cure.
Step 2)--for older (or more particular) children--I had the girls plan out their design on a piece of white paper.
Step 3) Spread a good amount of clear glue on the TOP of the glass in the frame. So the frame creates an edge for the glue. We put enough to cover the glass and then some. After squirting from the bottle, the girls used a foam brush to spread it around.
Step 4) Add your tiles/gems to the glue on TOP of the glass in the frame.
Step 5) We added a bit more glue over the top and between the tiles. Just to make sure everything was sealed for sure.
This step might have been overkill, but I plan to have these hanging in my window for at least a year. I don't want any of the tiles to start to fall out. My window does get some sun, though it is not direct light for the entire day, just in the morning hours. I'm hoping it holds with all the UV exposure.
Step 6) Let dry for several days. This step actually didn't take quite as long as I anticipated. After dealing with the cookie cutter suncatchers, I think these dried even faster than those. Two days maybe. Though I left them on the art room table in the sun so that may have sped up the drying process a bit.
Step 7) I used gorilla glue to secure suction cups to the back. I used larger ones at the top and smaller on the bottom. These 8 x 10 stained glass frames are pretty heavy so I wanted to make sure they would stay in the window.
I included a couple extra photos so you can see the seal I created under the glass and along the frame edge as well. It's not pretty on the underside. Remember gorilla glue will expand when it dries.
And here are the finished frames in my window! I LOVE these! They are so bright and fun. Just makes me happy to look up and see them in the window.
My nine year old created the one below. In her words, "just a design":
And this is my 7 year old's. She called hers "Garden". You can make out flowers with a green leaf by each one. And there's a dragonfly in the lower left on the side. And a butterfly on the right side above the red flower.
This project is perfect for any child who likes a tactile experience. Also, it's a good sensory experience with putting the tiles in the clear glue. I tried to take a couple photos to show the depth of the tiles in the frames and the tactile nature.
Now, if you are worried about the weight of these in your window. Or you might like a less "messy" version. OR you are short on time for a gift idea, I have a SHORT-CUT to this project. This came about just this afternoon when my daughter had a friend over and they were looking for a project to do in the art room.
I quickly pulled out some 5 x 7 Dollar Store frames. Cut contact paper (you can get this at the Dollar Store too!) to fit the glass in the frame. Taped the contact paper down with the sticky side up. They cut out tissue paper however they wanted, in the shapes they wanted, and placed the pieces on the contact paper.
My daughter used scrapbook punches to cut out these circles in the tissue paper:
Because both my daughter and her friend left "holes" where the contact paper showed through, when I turned it over it stuck to the glass. This was a nice way for it to be secured in place while I put it in the frame. I also trimmed any excess tissue paper that hung over the edge of the frame glass.
This can be adapted for different ages. If you have smaller children, you can cut the tissue paper yourself and just have them put the pieces on the contact paper. You can have them rip the tissue paper into small pieces first for a more organic feel to the work. They can practice using the scissors by cutting the tissue paper themselves.
Once the contact paper is covered with tissue paper, you can turn it over and put it on the BACK of the glass going into the frame. Then put the prongs down to hold it all in place. The contact paper stayed in place with the frame prongs. You could use tape to secure the contact paper more. I probably will glue it just to really secure everything. You can secure it however you like, depending on how much time you have. These would make fun gifts for Mother's Day or an end-of-the-year gift for teachers.
I think these turned out great! And are super fun in the window with the light shining through. The cool thing about these too, they look pretty neat in the window even when it's dark out. Sorry I don't have a photo of this. But the tissue paper appears opaque and you can still see the design when it is dark outside.
Every summer my kids and I work on one art project a week where they learn about an artist as well as various art techniques and concepts. Join us for our journey into art and art history! The rest of the year we spend crafting and seeing where our creativity takes us!
Tuesday, March 19, 2013
Friday, March 15, 2013
Sensory Activity: March Sensory Bin
I was a little late in getting our sensory bin switched around this month. In a perfect world, I would have done it about a two weeks ago before we left for a family vacation. But alas, I ran out of time. I was planning on actually doing two bins this month, St. Patrick's Day AND Easter. But I may have to wait and do an Easter one next year.
I think this month's bin is particularly bright and fun! And Kellan really seemed to enjoy investigating it today.
I tried to make it look like a little leprechaun made tracks and left the pot of gold. Of course, this was mostly to amuse myself because the whole idea was lost on Kellan. He doesn't know what a leprechaun is, let alone that he would leave a pot of gold. ;-)
This month's bin has green sand that I purchased from Michael's. It's the same kind of sand you use in sand art. Very fine and smooth! You can get it in an array of colors. Unfortunately, they only sell larger sizes in white. So I had to buy three smaller containers of it to fill the bottom of our bin. St. Patrick's stuff was 50% off too so I snagged the cookie cutter and glitter clovers. I had the transculent clovers from my bin last year. And the pot of gold was actually just sitting loose on the top of the St. Patrick's display. I couldn't figure out what it had been a part of and told the cashier I would like it, even though I didn't know how much it was or what it was part of. I think she probably thought I was nuts and she just gave it to me. ;-)
I also pulled out our green stacking pots and scoop and pour set from the Mama May I sets I got Kellan for Christmas. This is a PERFECT use for them! Wait till you see how he explored with them!
The stacking pots are part of this gorgeous set made by Jessica at Mama May I. And here's the link to her other scoop and pour set. If you'd like a little more information about this handmade toy shop, I wrote a review last November.
Kellan had great fun discovering the funnel and holes in the pots. He poured the sand in and watched it sift out over and over again.
I love the concentration in the photo above. He was so intent on watching the sand fall.
Can't you just see his brain working, and the learning and investigating going on! ;-)
I think this month's bin is particularly bright and fun! And Kellan really seemed to enjoy investigating it today.
I tried to make it look like a little leprechaun made tracks and left the pot of gold. Of course, this was mostly to amuse myself because the whole idea was lost on Kellan. He doesn't know what a leprechaun is, let alone that he would leave a pot of gold. ;-)
This month's bin has green sand that I purchased from Michael's. It's the same kind of sand you use in sand art. Very fine and smooth! You can get it in an array of colors. Unfortunately, they only sell larger sizes in white. So I had to buy three smaller containers of it to fill the bottom of our bin. St. Patrick's stuff was 50% off too so I snagged the cookie cutter and glitter clovers. I had the transculent clovers from my bin last year. And the pot of gold was actually just sitting loose on the top of the St. Patrick's display. I couldn't figure out what it had been a part of and told the cashier I would like it, even though I didn't know how much it was or what it was part of. I think she probably thought I was nuts and she just gave it to me. ;-)
I also pulled out our green stacking pots and scoop and pour set from the Mama May I sets I got Kellan for Christmas. This is a PERFECT use for them! Wait till you see how he explored with them!
The stacking pots are part of this gorgeous set made by Jessica at Mama May I. And here's the link to her other scoop and pour set. If you'd like a little more information about this handmade toy shop, I wrote a review last November.
Kellan had great fun discovering the funnel and holes in the pots. He poured the sand in and watched it sift out over and over again.
I love the concentration in the photo above. He was so intent on watching the sand fall.
Can't you just see his brain working, and the learning and investigating going on! ;-)
Hope you all have a fun St. Patrick's Day this weekend! I'll leave you with a little Irish blessing:
Wishing you a rainbow
For sunlight after showers—
Miles and miles of Irish smiles
For golden happy hours—
Shamrocks at your doorway
For luck and laughter too,
And a host of friends that never ends
Each day your whole life through!
For sunlight after showers—
Miles and miles of Irish smiles
For golden happy hours—
Shamrocks at your doorway
For luck and laughter too,
And a host of friends that never ends
Each day your whole life through!
Monday, March 11, 2013
Traveling with Creative Kids: 10 Things to Pack in Your Child's Carry-On (Preschool Age)
It has been five years since we last took a family vacation with just
the five of us where we had to fly on an airplane. We decided it was
time to go someplace warm for the winter. So we headed to Huntington
Beach, California! I obsessed for three weeks before our flight about
how to entertain three kids not only on the 3-4 hour plane ride there
and back, but also during the downtime we would inevitably have in our
rental house. The kids didn't have access to all their usual toys and
art supplies. And I really didn't want them to be vegging out with their
iPods for the whole trip. Even I get bored watching movies for four
hours or more!
After much pondering and Pinterest searching, here is what I came up with to entertain my three-year old son during our family vacation. All of these would work for a long car ride as well. And many are sensory rich for helping your sensory sensitive child stay entertained while they are confined in their seat.
Here are a few things I kept in mind while packing my son's carry-on bag:
1--He will be carrying his own bag. So I didn't want to make it too heavy. Though most likely my husband or I would end up carrying this at least part of the time. Another reason I didn't want it to be too heavy.
2--A variety of types of activities: books, hands-on activities, coloring, toys, and lastly, headphones and electronic devices.
3--water bottle (empty through security, filled before we boarded the plane). They didn't even ask for a drink from the flight attendant (less chance for spilling too).
4--snack box (filled with some fun and some healthy snacks) If they each have their own box of snacks, they can just pull it out whenever they want and snack away. No bugging you for snacks every five minutes and keeps them happy.
5--Remember you have a return flight too, so don't put your whole bag of tricks into the first flight and have nothing left for the return flight.
I found this travel backpack online. It received mixed reviews and I wasn't entirely sure about it.
But I really felt having some sort of tray for him on the airplane would save us all a lot of aggravation of constantly picking things up off the floor. And I didn't want him to have access to all of the activities I had packed for him at one time. So I put some things in this backpack and others in my carry-on. It ended up worked perfectly for us! I would recommend it, however, it does not hold very much at all.
Here is what was in his backpack to start:
PipeCleaners & Wikki Stix--At my son's age, I figure this will just be something he can play with, use as a fidget, scrunch up, etc.
I also packed both pipe cleaners and Wikki Stix for his sisters I figured I better have a couple for him in case he's interested when they are playing with theirs. I don't expect he'll really play with these much. However, if you have a child that is old enough, they could use the pipe cleaners and the wikki stix to bend over shapes, letters, numbers, etc that you write on paper as a stencil. Young children can also string beads or Froot Loops from their snack box onto the pipe cleaners, before eating them. In this case you could work on patterning or sorting.
Gel Clings--These can be bought at the Dollar Store. And are a great activity to do while you are sitting waiting to take off but don't want to have your bag or anything else out. All three of my kids LOVED these! If you know your child won't be in a window seat, you can include a transparency in your bag. They can just create an image on the transparency. We had the prettiest window on the plane! The stickiness of the gel clings also gives your child sensory input.
We received many compliments on these! :-) Below is the zoo parade my 9 year old created once we were in the air.
New Books--I bought everyone one or two new books for the trip. And also downloaded library books to our electronic devices.
Coloring/Coloring Book/Melissa and Doug Wow Book--I bought a Melissa and Doug Wow Water book. I picked the transportation themed book for my son because he's very into vehicles right now. Here are some others as well. Honestly, I like the Aquadoodle pens better than the Wow pens. They just seem easier to use for little ones. You can add water to these after security and before you get on the plane. Just store them in a ziploc bag so they don't leak on anything. My son is not into coloring at all, but you could also include a coloring book or crayons.
Travel mats (cars, trains)--I bought one new Thomas the Train set that he hadn't seen before. This one has an added sensory feature of pushing a button and a light on the front of James comes on. And I came across this amazing post on Pinterest for creating travel play mats and a tray for long car trips. Jamiee from Craft, Interrupted blogs all about the tray she made. And if you click on the photos in her post, she was kind enough to provide higher resolution images so you can create your own printables as well! I adapted this for air travel. I simply printed off four of the mats in her blog post, covered them in contact paper and folded them in half. I made sure they would fit in the tray portion of the travel backpack.
I also packed two cars, one of which was a Marble Racer police car that lights up (more sensory fun). He would have the option of running his new train along the tracks/roads or two cars. Switching out the mats helps make the experience new and fresh so maybe the child will play a bit longer. These can also be used on the floor at your destination for play mats and a quiet time activity. (If you are adapting this list for the car, you can use a cookie sheet for a tray and add magnetic play to the list as well).
And here is what I had in my carry-on for him:
Foam puzzles--I bought two foam puzzles at the dollar store. SUPER lightweight! And great for younger kids because there is no right or wrong way to put the puzzle together. So no frustration involved. It simply provides a nice tactile experience and works their fine motor skills. Added bonus....you can create a roadway with the puzzle pieces once you reach your destination. You could even flip the pieces over and draw road lines on the white back side of the puzzle.
Calico Critters--My son LOVES to manipulate things and these are a great thing to bring. They are tiny (so be careful with kids who are really young) so they don't take up much space. But they offer a great pretend play experience both on the plane and at your destination. The only downside to these is their price. However, I used rewards from our credit card to purchase these from Barnes and Noble. So I wasn't really out anything getting them.
Pop Beads--I bought these at Dollar Tree. Just another cheap, easy, and SMALL fine motor activity to keep little ones busy. Provides resistance and works on strengthening their grasp by pushing and pulling the beads apart.
iPad (AppMates)--My son received a fun new toy for his birthday: Cars-themed AppMates. He can use these little cars and "drive" on a special app on the iPad. He can explore different roads, race, etc. So even though he's using an electronic device. This is a bit more interactive. He also has several apps he likes to play on the iPad (Monkey Lunchbox, Monkey Preschool Math, Word Wagon, Bugs & Bubbles, Bugs & Buttons, and the Wreck-It Ralph storybook).
New worksheets/printables on the iPad: You can use this tutorial to put printable worksheets on your iPad using GoodNotes and Dropbox (there's a great tutorial here). You can have your child practice writing, matching, do mazes, coloring sheets, etc all on the iPad. And you can just clear the page and do it all again!
iPod & headphones (movies)--After all those activities are exhausted, then you can haul out the iPod/iPad and headphones and have them settle down for a movie and hopefully (crossing fingers) a nap! I use iSkysoft Media converter software to put my son's favorite movies on our devices.
SEE ALSO MY LIST OF THINGS TO PACK IN AN OLDER CHILD'S CARRY-ON!
Again, I got all of this packed into his travel backpack and this Lay-n-Go Lite bag in my carry-on. And it can all be played with during downtime at your destination. I got my Lay-n-Go Lite for a great deal on Zulily.com.


With children this age, you probably don't want to bombard or overwhelm them with all their options for activities on the plane at one time. My son is still mostly nonverbal (he also has sensory sensitivities) and we use a ton of photo/visual cues for him. I use an app called Pic Collage (it's free) to create "choice" pages for him. I made three collages for the plane, each with three or four choices of activities. I show him the collage image and let him pick what he wants to do. Once we are finished with an activity, he puts the image in the Pic Collage trash and picks a new activity from the remaining images. Once we were done with one collage, I moved on to the next page/collage. This is a great way to give your nonverbal child some power over their situation while you're still controlling the choices.
(Everything I've discussed in this post, we either already owned or I bought specifically for this trip.)
After much pondering and Pinterest searching, here is what I came up with to entertain my three-year old son during our family vacation. All of these would work for a long car ride as well. And many are sensory rich for helping your sensory sensitive child stay entertained while they are confined in their seat.
Here are a few things I kept in mind while packing my son's carry-on bag:
1--He will be carrying his own bag. So I didn't want to make it too heavy. Though most likely my husband or I would end up carrying this at least part of the time. Another reason I didn't want it to be too heavy.
2--A variety of types of activities: books, hands-on activities, coloring, toys, and lastly, headphones and electronic devices.
3--water bottle (empty through security, filled before we boarded the plane). They didn't even ask for a drink from the flight attendant (less chance for spilling too).
4--snack box (filled with some fun and some healthy snacks) If they each have their own box of snacks, they can just pull it out whenever they want and snack away. No bugging you for snacks every five minutes and keeps them happy.
5--Remember you have a return flight too, so don't put your whole bag of tricks into the first flight and have nothing left for the return flight.
I found this travel backpack online. It received mixed reviews and I wasn't entirely sure about it.
But I really felt having some sort of tray for him on the airplane would save us all a lot of aggravation of constantly picking things up off the floor. And I didn't want him to have access to all of the activities I had packed for him at one time. So I put some things in this backpack and others in my carry-on. It ended up worked perfectly for us! I would recommend it, however, it does not hold very much at all.
Here is what was in his backpack to start:
PipeCleaners & Wikki Stix--At my son's age, I figure this will just be something he can play with, use as a fidget, scrunch up, etc.
I also packed both pipe cleaners and Wikki Stix for his sisters I figured I better have a couple for him in case he's interested when they are playing with theirs. I don't expect he'll really play with these much. However, if you have a child that is old enough, they could use the pipe cleaners and the wikki stix to bend over shapes, letters, numbers, etc that you write on paper as a stencil. Young children can also string beads or Froot Loops from their snack box onto the pipe cleaners, before eating them. In this case you could work on patterning or sorting.
Gel Clings--These can be bought at the Dollar Store. And are a great activity to do while you are sitting waiting to take off but don't want to have your bag or anything else out. All three of my kids LOVED these! If you know your child won't be in a window seat, you can include a transparency in your bag. They can just create an image on the transparency. We had the prettiest window on the plane! The stickiness of the gel clings also gives your child sensory input.
We received many compliments on these! :-) Below is the zoo parade my 9 year old created once we were in the air.
New Books--I bought everyone one or two new books for the trip. And also downloaded library books to our electronic devices.
Coloring/Coloring Book/Melissa and Doug Wow Book--I bought a Melissa and Doug Wow Water book. I picked the transportation themed book for my son because he's very into vehicles right now. Here are some others as well. Honestly, I like the Aquadoodle pens better than the Wow pens. They just seem easier to use for little ones. You can add water to these after security and before you get on the plane. Just store them in a ziploc bag so they don't leak on anything. My son is not into coloring at all, but you could also include a coloring book or crayons.
Though my son isn't super into coloring, he really liked painting with the water pen. It had the added sensory experience of him being able to touch and slide his finger in the water on the page.
Travel mats (cars, trains)--I bought one new Thomas the Train set that he hadn't seen before. This one has an added sensory feature of pushing a button and a light on the front of James comes on. And I came across this amazing post on Pinterest for creating travel play mats and a tray for long car trips. Jamiee from Craft, Interrupted blogs all about the tray she made. And if you click on the photos in her post, she was kind enough to provide higher resolution images so you can create your own printables as well! I adapted this for air travel. I simply printed off four of the mats in her blog post, covered them in contact paper and folded them in half. I made sure they would fit in the tray portion of the travel backpack.
He really liked these mats!
I also packed two cars, one of which was a Marble Racer police car that lights up (more sensory fun). He would have the option of running his new train along the tracks/roads or two cars. Switching out the mats helps make the experience new and fresh so maybe the child will play a bit longer. These can also be used on the floor at your destination for play mats and a quiet time activity. (If you are adapting this list for the car, you can use a cookie sheet for a tray and add magnetic play to the list as well).
And here is what I had in my carry-on for him:
Foam puzzles--I bought two foam puzzles at the dollar store. SUPER lightweight! And great for younger kids because there is no right or wrong way to put the puzzle together. So no frustration involved. It simply provides a nice tactile experience and works their fine motor skills. Added bonus....you can create a roadway with the puzzle pieces once you reach your destination. You could even flip the pieces over and draw road lines on the white back side of the puzzle.
How it's meant to be used:
And as a circular track:
As a road:
Calico Critters--My son LOVES to manipulate things and these are a great thing to bring. They are tiny (so be careful with kids who are really young) so they don't take up much space. But they offer a great pretend play experience both on the plane and at your destination. The only downside to these is their price. However, I used rewards from our credit card to purchase these from Barnes and Noble. So I wasn't really out anything getting them.
My nine year old really enjoyed playing with these at our destination and on the return flight. These can appeal to a large age range of children.
Pop Beads--I bought these at Dollar Tree. Just another cheap, easy, and SMALL fine motor activity to keep little ones busy. Provides resistance and works on strengthening their grasp by pushing and pulling the beads apart.
![]() |
| Similar to these--just a Dollar Tree version |
New worksheets/printables on the iPad: You can use this tutorial to put printable worksheets on your iPad using GoodNotes and Dropbox (there's a great tutorial here). You can have your child practice writing, matching, do mazes, coloring sheets, etc all on the iPad. And you can just clear the page and do it all again!
iPod & headphones (movies)--After all those activities are exhausted, then you can haul out the iPod/iPad and headphones and have them settle down for a movie and hopefully (crossing fingers) a nap! I use iSkysoft Media converter software to put my son's favorite movies on our devices.
SEE ALSO MY LIST OF THINGS TO PACK IN AN OLDER CHILD'S CARRY-ON!
Again, I got all of this packed into his travel backpack and this Lay-n-Go Lite bag in my carry-on. And it can all be played with during downtime at your destination. I got my Lay-n-Go Lite for a great deal on Zulily.com.


With children this age, you probably don't want to bombard or overwhelm them with all their options for activities on the plane at one time. My son is still mostly nonverbal (he also has sensory sensitivities) and we use a ton of photo/visual cues for him. I use an app called Pic Collage (it's free) to create "choice" pages for him. I made three collages for the plane, each with three or four choices of activities. I show him the collage image and let him pick what he wants to do. Once we are finished with an activity, he puts the image in the Pic Collage trash and picks a new activity from the remaining images. Once we were done with one collage, I moved on to the next page/collage. This is a great way to give your nonverbal child some power over their situation while you're still controlling the choices.
(Everything I've discussed in this post, we either already owned or I bought specifically for this trip.)
Traveling with Creative Kids: 10 Things to Pack in Your Child's Carry-On (Elementary Age)
It has been five years since we last took a family vacation with just the five of us where we had to fly on an airplane. We decided it was time to go someplace warm for the winter. So we headed to Huntington Beach, California! I obsessed for three weeks before our flight about how to entertain three kids not only on the 3-4 hour plane ride there and back, but also during the downtime we would inevitably have in our rental house. The kids didn't have access to all their usual toys and art supplies. And I really didn't want them to be vegging out with their iPods for the whole trip. Even I get bored watching movies for four hours or more!
After much pondering and Pinterest searching, here is what I came up with to entertain my girls during our family vacation. All of these would work for a long car ride as well. And many are sensory rich for helping your sensory sensitive child stay entertained while they are confined in their seat.
Here are a few things I kept in mind while packing my daughters' carry-on bags (ages 7 and 9):
1--They will be carrying their own bags. So I didn't want to make it too heavy. Though you should see the heavy backpacks they carry to school everyday. Honestly, I wasn't too concerned about weight.
2--A variety of types of activities: electronic devices, headphones, books, craft projects, games, coloring. Including several sensory-friendly activities for those kids who need a little extra input!
3--water bottle (empty through security, filled before we boarded the plane). They didn't even ask for a drink from the flight attendant (less chance for spilling too).
4--snack box (filled with some fun and some healthy snacks) If they each have their own box of snacks, they can just pull it out whenever they want and snack away. No bugging you for snacks every five minutes and keeps them happy.
5--Remember you have a return flight too, so don't put your whole bag of tricks into the first flight and have nothing left for the return flight.
What I packed into their bags:
Wikki Stix--I bought the Rainy Day Wikki activity kit awhile ago and was saving it for a time when I really needed something. Not only can they make whatever they want with the Wikki Sticks. This kit has word finds (use the wikki sticks to circle the words), pictures to finish, and shapes to design. I made copies of the word finds so they each had their own copy. And I switched up the other pages for the return flight so each girl had different activities.
Pipe Cleaners--a nice sensory input activity. Soft and bendable, something the kids can manipulate with their hands and it is QUIET! Have them make a fun pipe cleaner sculpture, make their own necklaces or bracelets. Or whatever they come up with to do with them. You can also have them take FrootLoops from their snack box and make patterns, designs on the pipecleaners with their Froot Loops. Good fine motor skill work. You can usually find pipe cleaners at the dollar store. We received pipe cleaner kits for Christmas. I just put them aside and saved them for this trip.
I was surprised by what a hit the pipe cleaners were!! The girls LOVED creating with them.
Gel Window Clings--this activity will probably take school age kids about 30 seconds to do, but it will make their plane area cute, pretty and fun. These can be found at the dollar store. They can put them on their windows. OR, I gave each of my girls a transparency to use because I knew they weren't going to be in a window seat. I was surprised at how long they played with these! Also a really great sensory experience with the stickiness of the gel clings!
All of the above were housed minimally in one file folder and looked like this:
New Books--I put 1 or 2 brand new books in each of their bags. And each of my girls will also have a NookColor loaded with downloaded library books to read while we're on our trip.
Coloring Books/Markers--Mindware makes really amazing coloring books. We have several and their fine tip coloring markers. I highly recommend these markers! They work great and are long-lasting. These great books will take FOREVER for your kids to color in a page because they are so detailed. They also have books called Mystery Mosaics, Multiplication Mosaics, etc all using color by number or letter. You can add an educational component along with the creativity of coloring.
Games--Phase 10 (dice game or card version), Farkle, a deck of cards, Iota (a card game housed in a mini-tin similar to Qwirkle). I opted for the dice version of Phase 10. Housed the dice games in ziploc bags. They took up no room at all! You could use an empty airline cup and the inflight magazine to play the dice games (though you will have to be careful to keep the dice on the tray). I also threw in our Kanoodle game since it's small and portable.
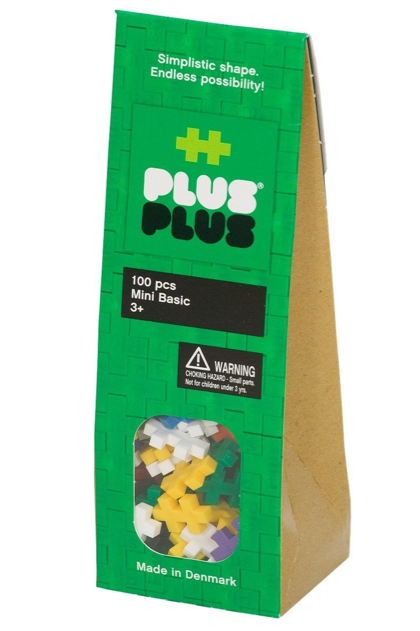
PlusPlus--great for building. Plus Plus is soooo small and light. Easy to bring along. Gives kids a chance to practice fine motor skills, visual perception and problem solving along with being creative. Get those brains working! They can create anything they can think of! We have 200 pieces and will just bring them in a ziploc bag. A zippered pencil case would also be a great way to travel with them.
Magnatab--Another great sensory toy for the elementary age. Sort of like a magnadoodle from when they were little. But Magnatab is the perfect travel size and has added sensory experience. This toy has a very tactile side to it. You can create a design/picture with the magnetic pen included. Then you can run your fingers over the small ball bearings you pulled up. You can also push each one back in if you want.
Mazes/Worksheets on the iPad--There is a website with tons of free maze printables! Download a few to GoodNotes using Dropbox (a great tutorial here) and your kids can do mazes over and over again on your iPad. Or if there are other printable worksheets they might be interested in, you can use this same technique to add them to your iPad for offline fun.
iPod/headphones--I loaded up their ipods with some movies (I use iSkysoft Media convertor software to put DVDs--that didn't come with digital copies--onto our iPods/iPads). I also included some new apps on their iPods/family iPad that they haven't played before: Minecraft, Pettson's Inventions 2, The Curse, Ansel & Clair--Paul Revere (there are also Ansel & Clair--Africa and Ansel & Clair--Dinosaur games), PlayArt, and Bridge Constructor.
Many of these things can also be used at your destination to entertain the kids during any downtime or quiet time between family activities.
SEE ALSO MY LIST OF THINGS TO PACK IN A PRESCHOOL CHILD'S CARRY-ON!
(Everything I've discussed in this post, we either already owned or I bought specifically for this trip.)
After much pondering and Pinterest searching, here is what I came up with to entertain my girls during our family vacation. All of these would work for a long car ride as well. And many are sensory rich for helping your sensory sensitive child stay entertained while they are confined in their seat.
Here are a few things I kept in mind while packing my daughters' carry-on bags (ages 7 and 9):
1--They will be carrying their own bags. So I didn't want to make it too heavy. Though you should see the heavy backpacks they carry to school everyday. Honestly, I wasn't too concerned about weight.
2--A variety of types of activities: electronic devices, headphones, books, craft projects, games, coloring. Including several sensory-friendly activities for those kids who need a little extra input!
3--water bottle (empty through security, filled before we boarded the plane). They didn't even ask for a drink from the flight attendant (less chance for spilling too).
4--snack box (filled with some fun and some healthy snacks) If they each have their own box of snacks, they can just pull it out whenever they want and snack away. No bugging you for snacks every five minutes and keeps them happy.
5--Remember you have a return flight too, so don't put your whole bag of tricks into the first flight and have nothing left for the return flight.
What I packed into their bags:
Wikki Stix--I bought the Rainy Day Wikki activity kit awhile ago and was saving it for a time when I really needed something. Not only can they make whatever they want with the Wikki Sticks. This kit has word finds (use the wikki sticks to circle the words), pictures to finish, and shapes to design. I made copies of the word finds so they each had their own copy. And I switched up the other pages for the return flight so each girl had different activities.
Pipe Cleaners--a nice sensory input activity. Soft and bendable, something the kids can manipulate with their hands and it is QUIET! Have them make a fun pipe cleaner sculpture, make their own necklaces or bracelets. Or whatever they come up with to do with them. You can also have them take FrootLoops from their snack box and make patterns, designs on the pipecleaners with their Froot Loops. Good fine motor skill work. You can usually find pipe cleaners at the dollar store. We received pipe cleaner kits for Christmas. I just put them aside and saved them for this trip.
I was surprised by what a hit the pipe cleaners were!! The girls LOVED creating with them.
Lily made a bird in a cage.
Gel Window Clings--this activity will probably take school age kids about 30 seconds to do, but it will make their plane area cute, pretty and fun. These can be found at the dollar store. They can put them on their windows. OR, I gave each of my girls a transparency to use because I knew they weren't going to be in a window seat. I was surprised at how long they played with these! Also a really great sensory experience with the stickiness of the gel clings!
My 9 year old created a zoo parade!
All of the above were housed minimally in one file folder and looked like this:
New Books--I put 1 or 2 brand new books in each of their bags. And each of my girls will also have a NookColor loaded with downloaded library books to read while we're on our trip.
Coloring Books/Markers--Mindware makes really amazing coloring books. We have several and their fine tip coloring markers. I highly recommend these markers! They work great and are long-lasting. These great books will take FOREVER for your kids to color in a page because they are so detailed. They also have books called Mystery Mosaics, Multiplication Mosaics, etc all using color by number or letter. You can add an educational component along with the creativity of coloring.
Games--Phase 10 (dice game or card version), Farkle, a deck of cards, Iota (a card game housed in a mini-tin similar to Qwirkle). I opted for the dice version of Phase 10. Housed the dice games in ziploc bags. They took up no room at all! You could use an empty airline cup and the inflight magazine to play the dice games (though you will have to be careful to keep the dice on the tray). I also threw in our Kanoodle game since it's small and portable.
PlusPlus--great for building. Plus Plus is soooo small and light. Easy to bring along. Gives kids a chance to practice fine motor skills, visual perception and problem solving along with being creative. Get those brains working! They can create anything they can think of! We have 200 pieces and will just bring them in a ziploc bag. A zippered pencil case would also be a great way to travel with them.
Magnatab--Another great sensory toy for the elementary age. Sort of like a magnadoodle from when they were little. But Magnatab is the perfect travel size and has added sensory experience. This toy has a very tactile side to it. You can create a design/picture with the magnetic pen included. Then you can run your fingers over the small ball bearings you pulled up. You can also push each one back in if you want.
Mazes/Worksheets on the iPad--There is a website with tons of free maze printables! Download a few to GoodNotes using Dropbox (a great tutorial here) and your kids can do mazes over and over again on your iPad. Or if there are other printable worksheets they might be interested in, you can use this same technique to add them to your iPad for offline fun.
iPod/headphones--I loaded up their ipods with some movies (I use iSkysoft Media convertor software to put DVDs--that didn't come with digital copies--onto our iPods/iPads). I also included some new apps on their iPods/family iPad that they haven't played before: Minecraft, Pettson's Inventions 2, The Curse, Ansel & Clair--Paul Revere (there are also Ansel & Clair--Africa and Ansel & Clair--Dinosaur games), PlayArt, and Bridge Constructor.
Many of these things can also be used at your destination to entertain the kids during any downtime or quiet time between family activities.
SEE ALSO MY LIST OF THINGS TO PACK IN A PRESCHOOL CHILD'S CARRY-ON!
(Everything I've discussed in this post, we either already owned or I bought specifically for this trip.)
Subscribe to:
Posts (Atom)